

I am so pleased to share with you a crafty guest post by Sheila Ralston. You may remember Sheila as the author of our very first guest post here on FTTDWYW. To this day, it is still our most highly viewed post and has made this site SUPER popular in Poland- according to Google Analytics. This time, she brings us another great knitting post that introduces us to a great sock pattern, but also gives us some tips on dealing with patterns in a foreign language! Enjoy, y’all! ~Leigh

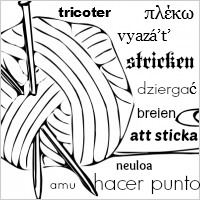 It happens all the time: I find the cutest thing a knitter ever knitted in the Ravelry pattern database or forums, only to learn upon clicking through to the pattern page that the instructions are in a foreign language that I can’t even fake my way through with my high school French. Be it Norwegian, Japanese, or Estonian, those non-English languages have a different word for everything!
However, it’s really not that hard to translate knitting patterns using tools found on Ravelry and the web in general. I’ve successfully made items from Japanese, German, and Finnish patterns I found on Ravelry, and so can you, using the following handy tips.
- Only try to make something you already basically know how to make.
Your first sock or sweater ever should not be from a pattern you’ve translated yourself from Russian. The basic construction style (raglan or set-in sleeves on a sweater for example, or heel flap and gusset or short-row heel on a sock, etc.) should be familiar to you already, too. Have a few of the kind of thing being made in the foreign-language pattern under your belt first; then you will have a basic notion of what kind of information you’re looking for in the pattern, and about where it should be in the text, because…
- Google Translate does not speak knitting, exactly.
Although I always begin by running the pattern through Google Translate, a certain amount of interpretation based on experience is needed to parse the results. [Update. Reader Faina Letoutchaia shares some tips that might help with online translators: In many languages words are much more flexible than in English. A huge variety of suffixes (postfixes), prefixes, noon decline and noons, verbs and adjectives conjugate. All these features make translation more difficult. If you have difficulties with translation a particular word, try to cut out last 2-3 letters, first 2-3 letters – those may be changeable parts. Then try to find out what these changeable parts mean. Another difficulty is abbreviations. For this only knitting specific dictionaries may help, like VK translator you mention in your post. See below–Ed. Thanks Faina! Your instructional book & video on advanced sweater techniques look awesome, I’m so tempted to order them.]
So for example, with this Finnish sock pattern I found on Ravelry, the first paragraph of instructions, which began
Luo 72 silmukkaa ja jaa ne tasan neljälle puikolle, 18 s/puikko. Neulo ensin *1 n, 2 o, 3 n, 2 o, 1 n* resoria n 5 cm tai haluamasi määrä, aloita sitten mallineule kaavion mukaan.
Was translated by Google to read:
Luo 72 stitches and share they equally four needle, of 18 s / electrode. Work at first * 1 n, 2 No, 3 n, 2 No, 1 n * elastic the 5 cm or Required count, start ago pattern chart According to.
Although no gauge is given for this pattern, 72 stitches is a pretty standard number of stitches to cast on for a sock worked from the cuff down, and patterns do typically instruct you to divide the cast-on stitches evenly on 3 or 4 needles; dividing 72 stitches on four needles, you get 18 stitches per needle. The next instruction seems to be referring to a stitch pattern between the stars to be repeated around the cuff. 1 + 2 + 3 + 2 +1 = 9, which divides equally into 72 stitches 8 times. Most sock cuffs begin with ribbing, presumably the word Google translated to “elastic”, and typically you do 2 or so inches of it. 5 cm equals about 2 ½ inches. So, it looks like we are instructed to begin with a ribbing pattern, and all that remains is to figure out which are the purls and which are the knits in this pattern, since Google doesn’t seem to understand those terms at all.
- Refer to this handy list of web resources for translating knitting terms in a variety of languages to supplement your translation..
Sadly, it turned out that, when I looked at the recommended translation pages for Finnish knitting terms, both knit and purl start with an “n.” Going back to Google Translate and typing “knit” and “purl” for Google to translate into Finnish resulted in words that began with “n” and “s” respectively. Finally, I Googled for more Finnish knitting translation resources, and found a translator at Vogue Knitting that gave me “oikea” for “knit” and “nurja” for “purl,” and I was off to the races. (And then, when I sat down to write this post, I finally looked at the chart key, which gave the definitions “olkein” and “nurin” for the standard “knit” and “purl” symbols. No, I have no idea why there are so many different words for “knit” and “purl” in Finnish.) [Update. Reader Salla explains in comments: The Finnish words for “knit” and “purl” are not actually that complicated nor diverse – the variations used are usually neulo oikein/neulo nurin (“knit frontwise/knit backwise”), oikea silmukka/nurja silmukka (“front stitch/back stitch”) and oikein/nurin (“frontwise/backwise”). As you can tell, they basically say the same thing, and indeed, the meanings are identical. Thanks Salla!– Ed.]
- Make sure you have a good picture of the finished object to check against your progress.
There may be parts of a foreign pattern that make no sense until you get far enough along to see you’ve gone wrong. In the case of the Finnish socks, I just skipped over some gobbledy-gook sentences from Google Translate after the part about the ribbing because I couldn’t make head nor tail of them. But it turned out that they probably had something to do with the correct place to start the charted pattern. I was able to tell that my diamond cable was in the wrong place by comparing my sock with the excellent photos provided by the designer on the pattern page in Ravelry, and so fixed the issue by relocating the heel (before it was too late to do so).
- Learn to Read Charts.
I realize that some knitters have a specific disability that prevents them from reading charts correctly, but if this is not you and you’d like to use foreign-language patterns, it is tremendously helpful to know how to read knitting charts. In the case of these Finnish socks, the cable pattern was only provided in chart form; this is often true of German patterns as well, while Japanese patterns are usually fully charted from cast-on to cast-off with very little explanatory text. Here’s a good introduction (it must be downloaded, but it is only a few pages) to reading knitting charts; I also recommend Barbara Walker’s classic Charted Knitting Designs (also called her Third Treasury in some editions) for more discussion of chart reading. I’ve hear other knitters heartily endorse Charts Made Simple by J.C. Briar as well.
- Ask a Knitter.
If all else fails, there are several group forums on Ravelry dedicated to discussing knitting translations. Excuse Me? covers all languages, while Japanese Knitting and Crochet covers the increasingly popular Japanese patterns. If the pattern you want to knit is by a popular designer, you might be able to find a group dedicated to that designer and familiar enough with the patterns to offer very useful advice. For example I was able to find out several uncharted (but vital) instructions about a German-language Herbert Niebling pattern I was working from charts alone in the Herbert Niebling forum.
- Always read the pattern page on Ravelry.
Each pattern on Ravelry has its own page, and before beginning any project, it’s always a good idea to check the project pages, forum comments, and comments tab before you begin to find out what other knitters have had to say about the pattern. If there are many projects for the pattern, you can sort the projects by “helpful notes” on the projects page. You never know what kinds of helpful information you might find. I usually skip this step and find out later that, yeah, everybody else who made this project thought the fit was loosey-goosey and that the recommended increases were ugly, too, when it’s too late to do anything about it short of ripping back to the beginning. Do as I say, not as I do, oh efficient knitters who are not me.
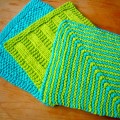
Anyhow, below is my translation of the Finnish sock pattern, which the designer, Paivi Hoo, has graciously given me permission to publish here. I don’t have the software to reproduce the charts, so you will still need to download the chart from the Finnish-language pattern if you would like to knit the socks.

Diamond-Cable Socks by Paivi Hoo.
(as translated by me)
Note: I used size 3 needles for the cuff down to the heel, then size 2 for the heel and foot of the sock. The recommended size 1 ½ (2.5 mm) needles would have made the socks too small for me at my gauge. I worked at 8 stitches to the inch in plain stockinette on the size 2 needles, and ended up with sock that fit an 8 1/2” in circumference foot, albeit with the slightly loose fit that I like for myself.
Materials:
- 100 g (420m/460 yd) of fingering weight sock yarn
- 2.5 mm/US size 1 ½ double-pointed needles, set of five
- Cable needle
Gauge: not given
Socks shown are size 40 (about a woman’s size 8 in American sizes though see my note above). Use larger or smaller needles to adjust size.
Cast on 72 stitches and divide equally on 4 needles, 18 st per needle.
Work in ribbing as follows: *p1, k2, p3, k2, p1*; repeat from * to *. Continue until piece is 5 cm/2 ½ in long, or to desired length.
Begin working charted cable pattern at round 18; work through round 36, then work through rounds 1-28.
Begin heel
Heel will be worked back and forth on the 36 stitches of needles 1 and 4. Using needle four, knit across needle 1 in pattern for row 29, then turn to work back and forth. Slipping the first stitch, work row 29 again, across all 36 stitches. Slipping the first stitch on every row, work rows 30 through 36 of pattern. Once the diamond shape has been completed, work row 1 back and forth, until 27 heel rows have been completed, ending with a wrong-side row.
Turn heel
- Row 1: k3, p3, k6, p3, k5, k2tog, k1, turn
- Row 2: Slip 1 stitch, P5, P2tog, p1, turn
- Row 3: Slip 1 stitch, knit across until 1 stitch before gap, k2tog, k1, turn
- Row 4: Slip 1 stitch, purl across until 1 stitch before gap, p2tog, p1, turn
Repeat rows 3-4 until 20 stitches remain, ending on a wrong side row.
Slip 1 stitch, k 19 across.
Form gusset
Pick up 15 stitches along left side of heel, knit across instep stitches in pattern (beginning with row 29, and working only the central diamond pattern, maintaining stitches on either side in ribbing as established), pick up 15 stitches along right side of heel, and knit 10 more stitches, to center of heel.
Next round:
Begin gusset decreases. Knit to last 3 stitches on needle 1, k2tog, k1, knit instep stitches in pattern (working only central diamond cable as established), on needle 4 k1, ssk, knit to end of needle.
Next round:
Work even.
Repeat these two rounds until there are 72 stitches left on the needles.
Work even until two more diamonds* have been completed, then continue in ribbing as established.
When sock is 2 ¼ inches shorter than toe, begin toe decreases. (Note: I was not able to figure out the toe decreases in the original pattern, so I used a standard toe decrease instead).
Round 1:
On needle 1, knit to last 3 stitches, k2tog, k1
On needle 2, K1, ssk, work across in pattern as established
On needle 3, work across in pattern as established to last 3 stitches, k2tog, k1
On needle 4, K1, ssk, knit to end.
Round 2:
Work even
Repeat these 2 rounds until 36 stitches remain, then repeat round 1 until 12 stitches remain.
Graft toe stitches.
*(Depending on length of foot. I was able to complete only one diamond with my total foot length of 8 inches)
Chart Key
In order from top to bottom:
Knit
Purl
Slip next 3 sts to cable needle and hold at back of work, knit next 3 sts, then knit 3 sts from cable needle
Slip next 3 sts to cable needle and hold at front of work, knit next 3 sts, then knit 3 sts from cable needle
Slip next 2 sts to cable needle and hold at back of work, knit next 3 sts, then knit 2 sts from cable needle
Slip next 3 sts to cable needle and hold at front of work, knit next 2 sts, then knit 3 sts from cable needle
Slip next 2 sts to cable needle and hold at back of work, knit next 3 sts, then purl 2 sts from cable needle
Slip next 3 sts to cable needle and hold at front of work, purl next 2 sts, then knit 3 sts from cable needle
Slip next st to cable needle and hold at back of work, knit next 3 sts, then knit 1 st from cable needle
Slip next 3 sts to cable needle and hold at front of work, knit next st, then knit 3 sts from cable needle
Slip next st to cable needle and hold at back of work, knit next 3 sts, then purl 1 st from cable needle
Slip next 3 sts to cable needle and hold at front of work, purl next st, then knit 3 sts from cable needle
Happy knitting! And please feel free to pm me on Ravelry (I am mollpeartree) with any questions about the pattern.


The Finnish words for “knit” and “purl” are not actually that complicated nor diverse – the variations used are usually neulo oikein/neulo nurin (“knit frontwise/knit backwise”), oikea silmukka/nurja silmukka (“front stitch/back stitch”) and oikein/nurin (“frontwise/backwise”). As you can tell, they basically say the same thing, and indeed, the meanings are identical.
It all makes sense now! Thank you :-).
Hi my name is jeanette van rooyen i have a russian knitted toy pattern which i translated into english but there are a few words i do not understand i will even pay to have them tanslated into our english words.
Please can you help i would really appreciate it.
Kind regards jeanette
Looks to me like you covered most of the issues.
I would like to point to one more – in many languages words are much more flexible than in English. A huge variety of suffixes (postfixes), prefixes, noon decline and noons, verbs and adjectives conjugate. All these features make translation more difficult. If you have difficulties with translation a particular word, try to cut out last 2-3 letters, first 2-3 letters – those may be changeable parts. Then try to find out what these changeable parts mean.
Another difficulty is abbreviations. For this only knitting specific dictionaries may help, like VK translator you mention in your post.
Thank you!
That’s a great tip; I will definitely try that next time. Thanks so much for sharing!
Good article, though I might perhaps rely less on Google Translate and more on specific knitting lexicons (garnstudio.com has a good multilingual one).
As for charts…you say you don’t have the software to reproduce them. Can I recommend Sconcho, a decent open-source knitting chart generator? Or do you need something that it won’t do? (And if so, just scan them?)
The words are (1lits,etc.)
14lits (pr 1 lits) x 16 14 lits (76)
42 lits, nakida
What do they mean
Consulting this translation link (http://www.vogueknitting.com/pattern_help/how-to/international_knitting_terms/english-russian), I think “lit” might mean knit stitch, and nakida might mean yarn over. I don’t know what the instructions with parenthesis means, though. If you link to a picture of the project I might be able to guess.
Consulting this translation link (http://www.vogueknitting.com/pattern_help/how-to/international_knitting_terms/english-russian), I think “lit” might mean knit stitch, and nakida might mean yarn over. I don’t know what the instructions with parenthesis means, though. If you link to a picture of the project I might be able to guess.