
Yesterday was a great day for me. I was feeling much better (thankyaforaskin’) and was able to catch up on a lot of stuff that was on my list. I got to talk to some of my favorite people today and am feeling enriched; it was a soul-nourishing day. Thursday was a prep day. I’m working today so Thursday was spent getting stuff DUN. Blog posts? Check! Work stuff prepped? Double check!
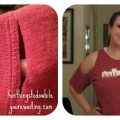
A plain, long-sleeved t-shirt is like a blank canvas for me so when I want to do a quick-craft, I always turn to the t-shirt mod. I don’t want to talk about the artists vision, or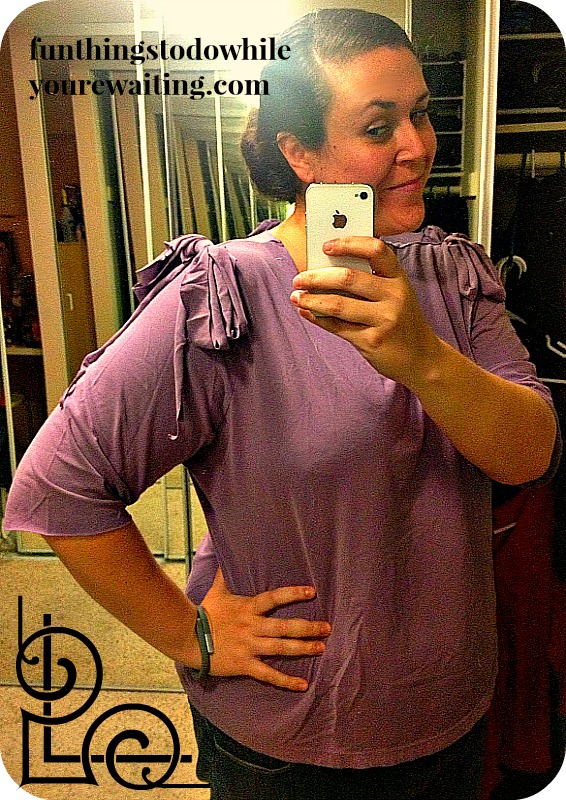 sculptures within the clay, but sometimes the modification finds the t-shirt (where any shirt will do) and other times, the t-shirt finds the mod (where certain shirts get special treatment). I’ve been digging 3/4 length shirts lately, and had a plain, long-sleeved purple Target tee with which I’d been wanting to do something. I’m calling it Rock Ballerina. The color is soft, and there are ribbons, but these epaulettes could also as easily been rocked by Debbie Harry, ya dig? Total cost for this project, $9 (six years ago). Total time: one episode of Star Trek Voyager, and half of an episode of Nashville.
Like all the other t-shirt mods we’ve done in the past, you want to start with an even, folded canvas so that when you start cutting your sleeve length, the lines will be even. If you are new to t-shirt modification, be sure to check out the above two links for some basic principle stuff. If you’ll notice in the first picture of the below collage, the t-shirt is folded in half with all hem lines squared up. Then, decide how long you want your sleeves to be! The mint color is where I made my sleeve cuts as evidenced by the second photo.
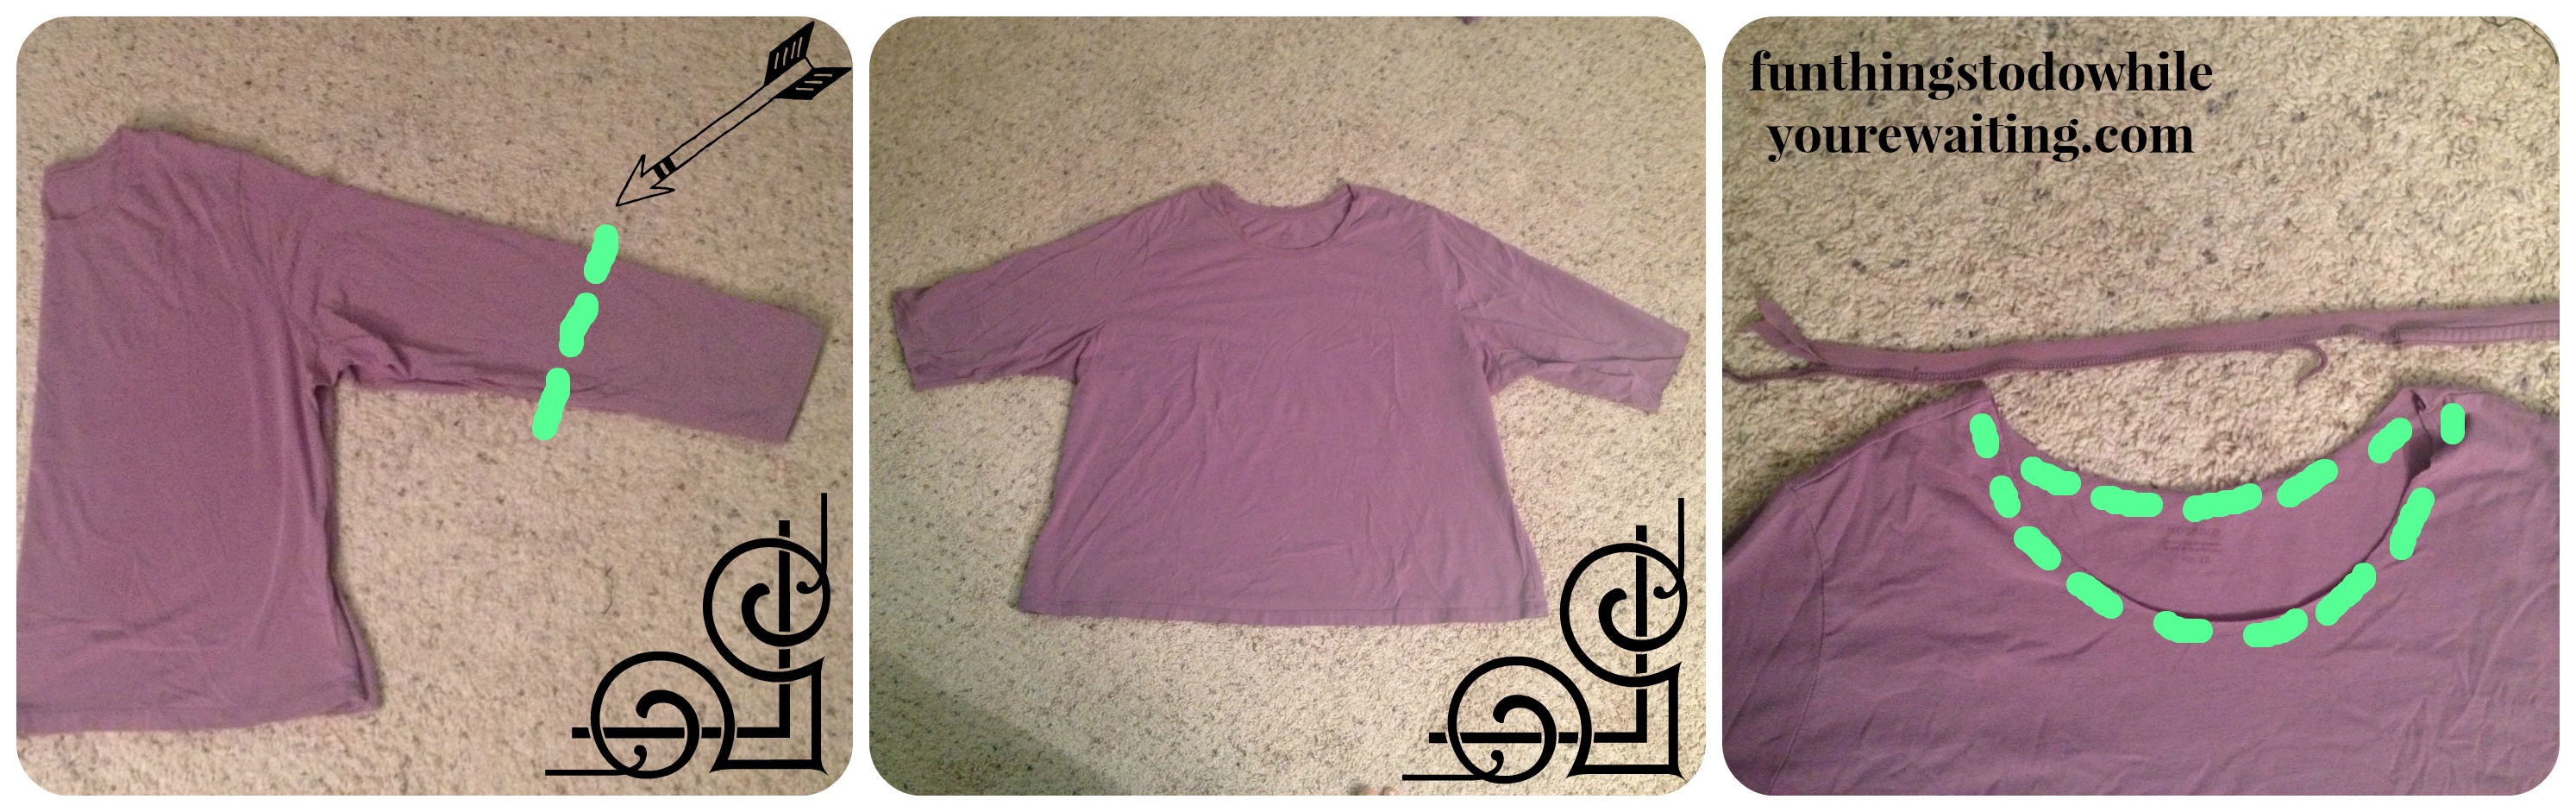
Tada! You’ve got a new sleeve length. With the sleeves done, it was time to look at the collar. For me, removing the collar is always one of my first steps I do when doing any t-shirt mod. Ease into the hemmed collar and cut just below the seam line of the original collar. Once you’ve removed the original hemmed collar shape the neckline into whatever style you wish. I went pretty tame (no super deep-vees or nuffin’). I just followed the original collar line but a little further in. The third picture shows the removed collar above shirt after de-collarification. Totally made that word up. But save that collar scrap! We’ll use that later.
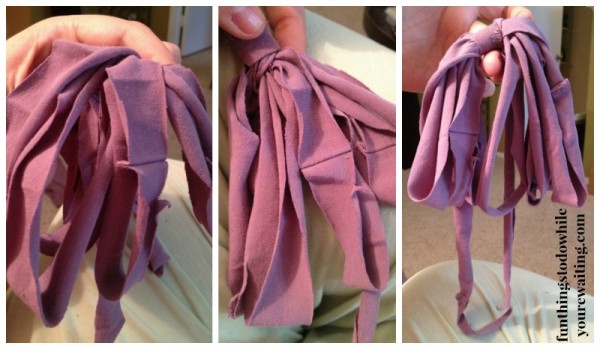
Like the Indians with the mighty buffalo, I try and use as many parts of a t-shirt without wasting any fabric. Since there is so little fabric to work with in this project (just the ends of the sleeves and a collar) each inch of fabric is precious. The color of this shirt always spoke bows and ribbons to me, so I knew I wanted to do some sort of shoulder treatment. In order to get a long strip of fabric from a round sleeve or something, simple cut inwards at an angle until you reach the bottom. Working from the top downward to the left, cut a spiral from your sleeve. The first photo shows the rough, diagonal angle. It doesn’t have the be perfect- the more ratchety the better. The second picture shows you starting to cut in and start your spiral. Only cut through the top layer of fabric.
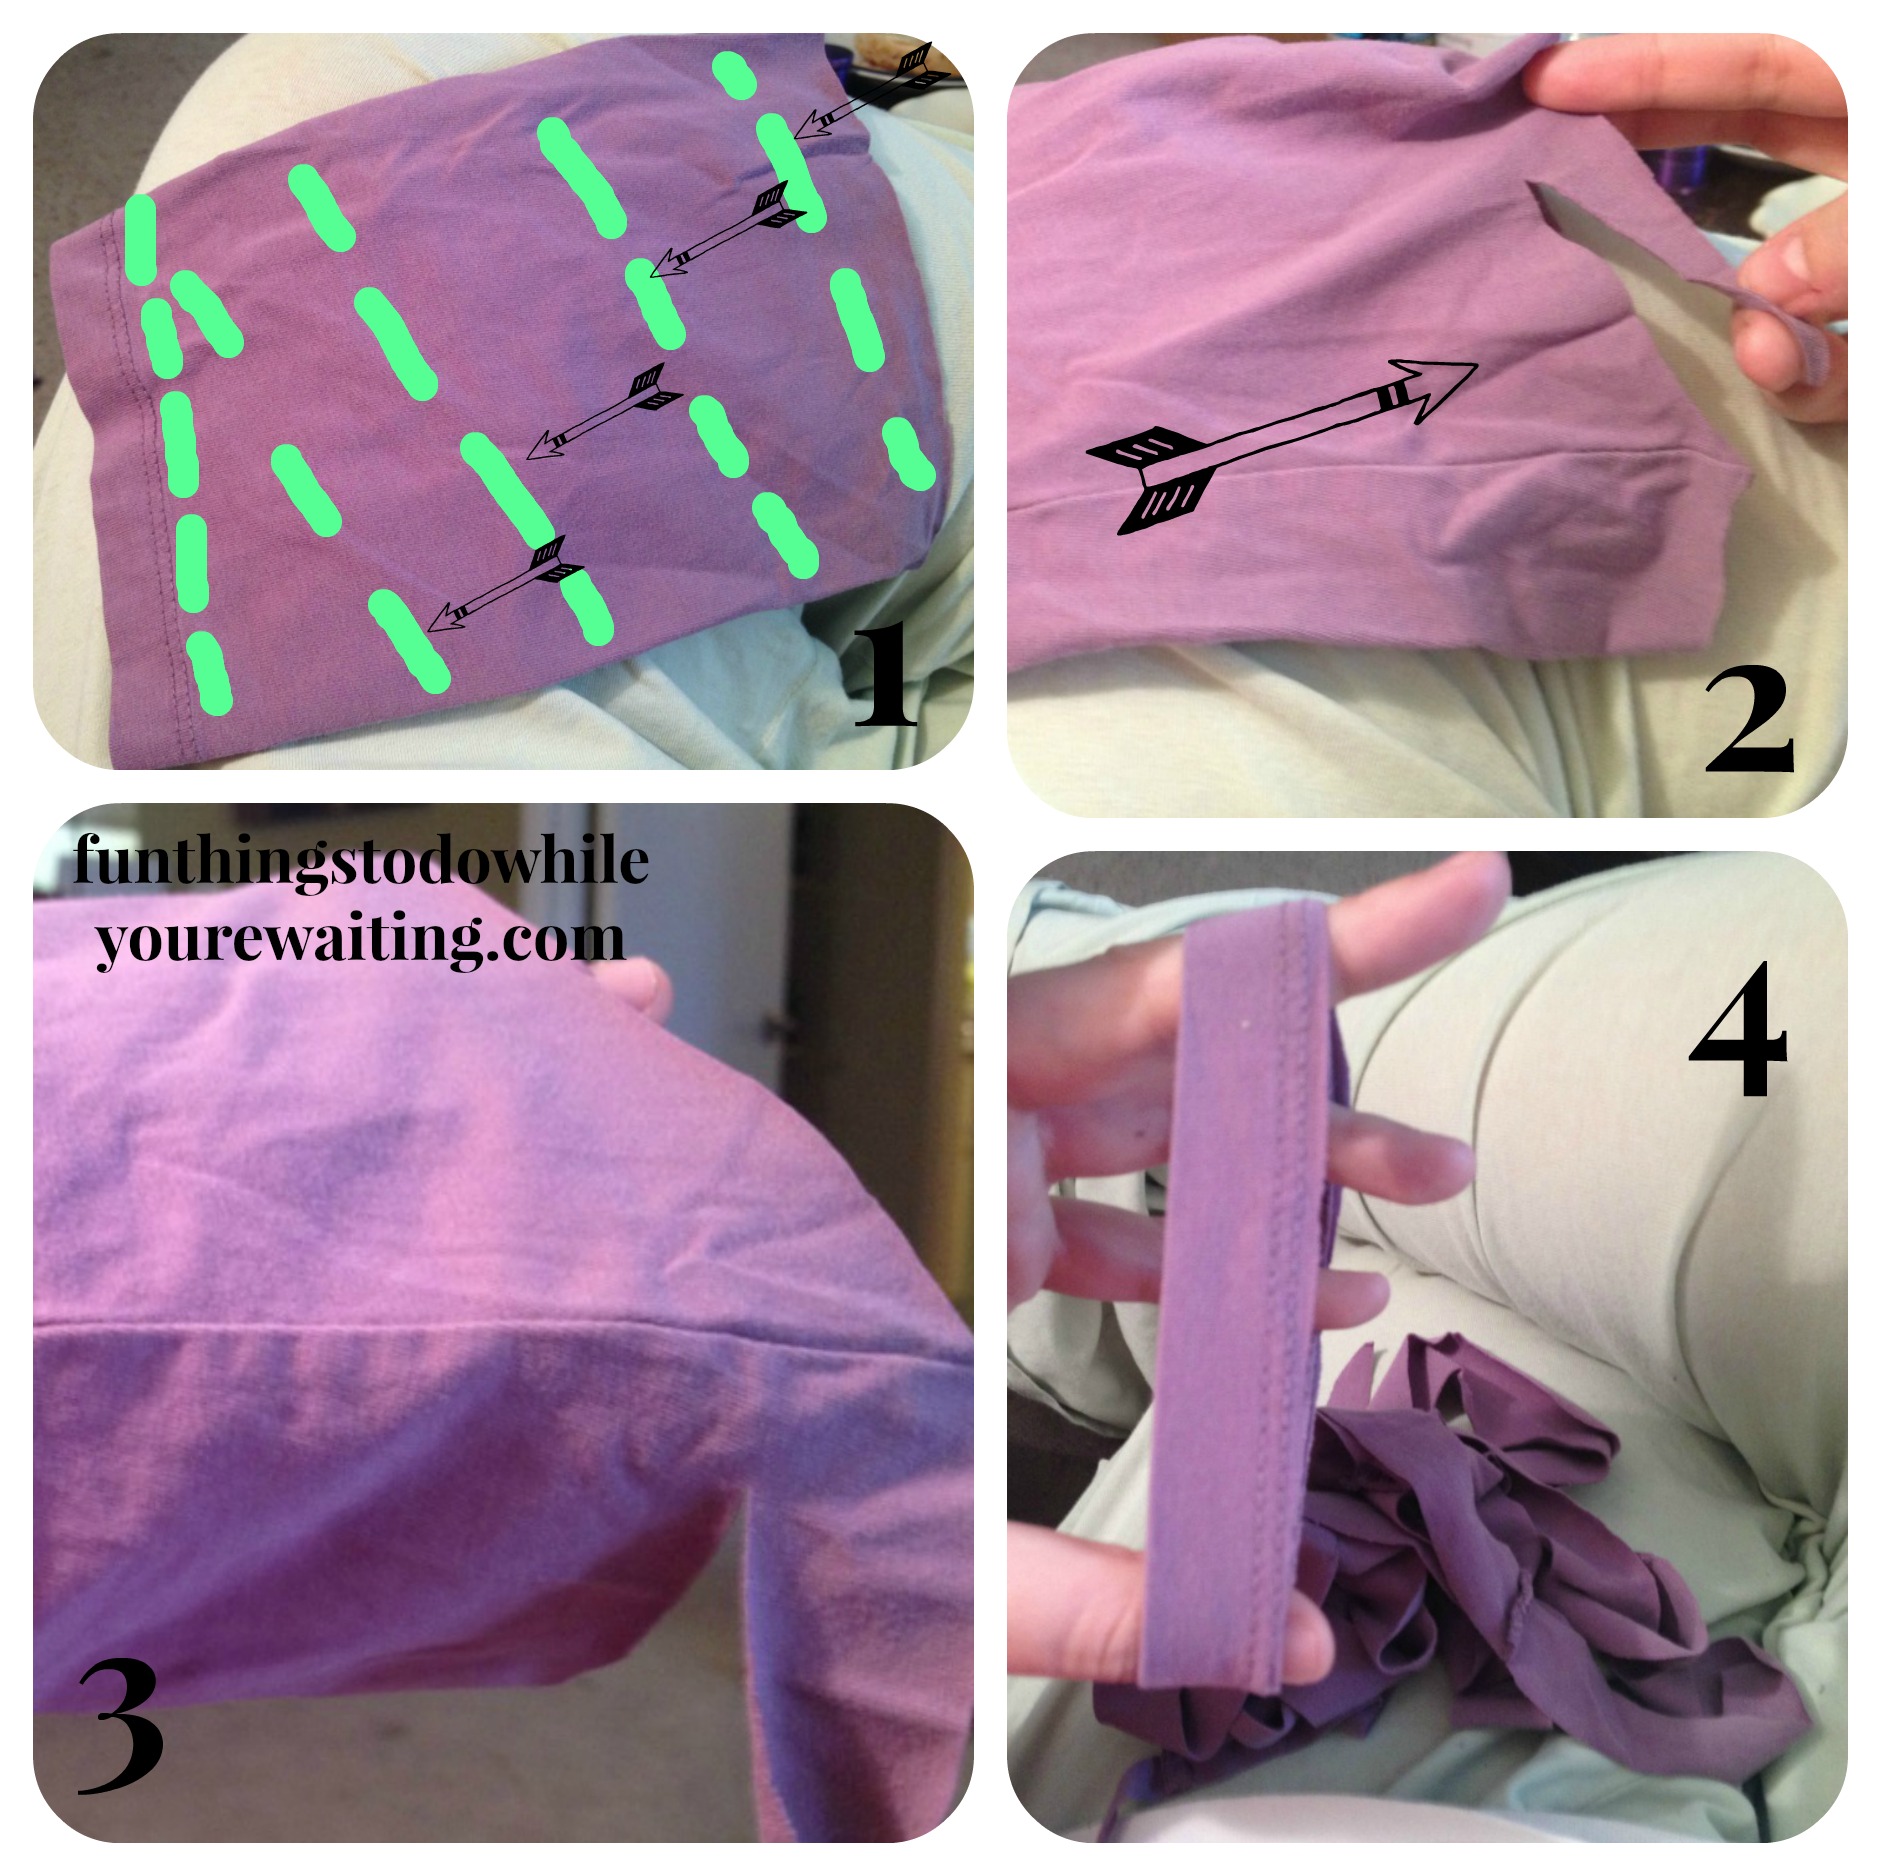
The third picture is just more spiral cutting. Makes me excited for ham. Just keep cutting one long continuous ribbon until you’ve reached the arm seam. The fourth picture shows you when to stop. Hold on to that sleeve seam. We’re going to use THAT later, as well… but for now, we’re going to use that long piece of fabric!
Making the bows follows the basic principals of all schmancy bow making. If you’ve ever had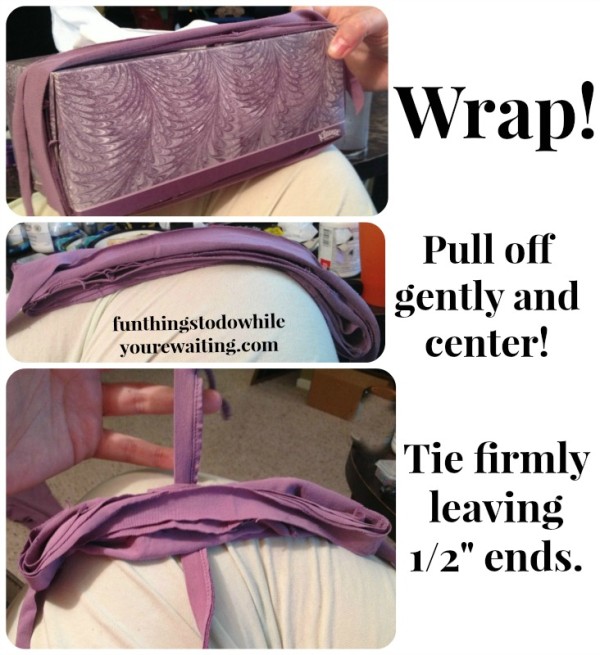 to wrap presents for retail work you’ve probably already mastered the art of bow making. How big do you want your ribbons to be? That’s something only your heart can decide. I wrapped my ribbon (seams down) around a Kleenex box. Find an object that you can wrap your ribbon around that will produce the final length of the bow you want. Play around with it. Put on your shirt and decide how big you want that bow to be! Once you are happy with the width of your bow, use a piece of the collar to tie off the middle of your bow. Pull firmly and leave 1/2″ tails of the knot.
Here is where bow mastery will come in handy. But fear not, anybody can do this. Once your bow is tied from the above step, you will want to separate all the rungs of jersey ribbon. Try and manipulate the ribbons so that each rungs top and bottom are as close as possible. Once you have separated each rung, twist the base of the rung to set it to the desired fold.
Make another ribbon from the other sleeve remnant and make another bow to match the other beautiful one you just made. Yay! You now have a set! Let’s make it pretty and stick it on your shirt!
Take the round hem of your sleeve spiral that we held onto and cut it in half and then in half again so that you have two strips. These strips are going to cover the knots AND attach the bow to your shirt.
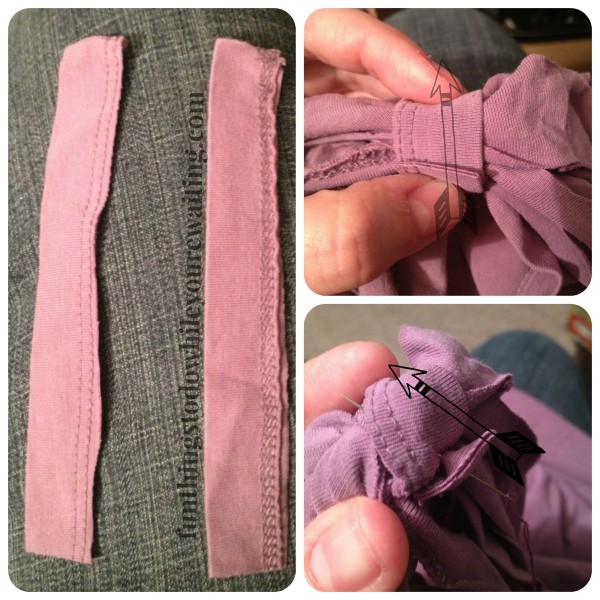
You are going to take one of your straps and wrap it around your original knot. Do you see in the second picture how the wrapped strip overlaps in the back? This is the area that is going to be attached to the shoulder seam and won’t be seen, so don’t sweat about how pretty you make it. Find a thread that is roughly the color of the shirt you are working on and take a sharp needle and pierce all the way through the strips and the bow fabric. The goal is to get thread running through all the layers of the bow so that it won’t fall apart when you wash it. You’ve used the strips to make a pretty knot cover, but slide it over a little so that you can pierce the needle all the way through the lower parts of the bow beneath, but not through cover layer! Do this several times until you feel it is secure.
Now, we are going to baste (simple stitch) stitch these bad boys onto the shoulder seam. I placed my bows smack-dab on the outer shoulder seam, but the world is your oyster! Since all the work and attachment string will be covered or on the inside of your shirt this should make for simple work. Every time you come up from the shirt, make sure to pierce several layers into your center knot bow. You basically just want to anchor this bow onto that shoulder seam as strongly as possible- easier than sewing on a button. Double your thread and get to stitching!
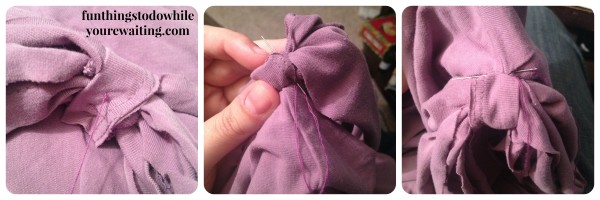
Try it on! See how it feels. If the bows don’t feel secure enough, sew a couple more basting stitches. Just make sure all your thread work stays under the knot cover strip. Tie-off and secure your thread on the inside of your shirt. Commence to rocking… gracefully.
As always, thanks for reading! If you try it out, let me know! If you have any tips or suggestions, hit me up!
XOXO- Leigh


2 Comments