
I love photos. They take me right back to the moment they capture. They are a back-up for my memory. I have always loved them- I just have. I have collected picture frames since elementary school. In fact, I have so many that I have slowed my obsessive need to buy more because I do not have room for more… until now.
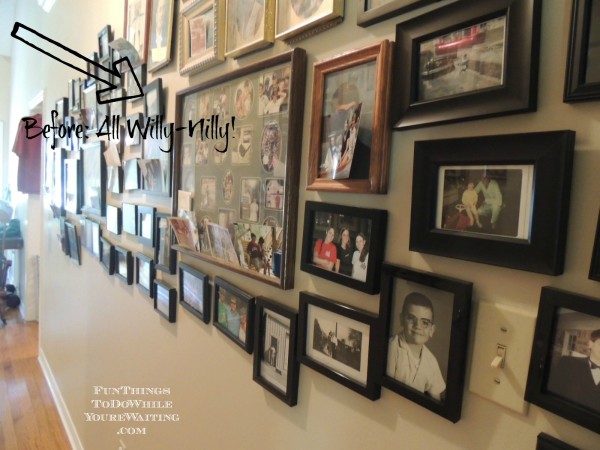
When you walk into my front door, immediately to the right is an open staircase and straight ahead is a 20ish foot hallway that empties into my kitchen. Even before we bought the house, I knew I wanted to cover the walls of the hallway with my frames, at least the ones that will hang. So, that is what I did. I just eye-balled it. It was a mess! I mean, it was just willy-nilly. Not that it was horrible, but it was about 4 degrees away from horrible.
We have been working on that hallway for a couple months now. It began with removing wallpaper and then my weekend of projects back in September. We finally got that area of the house painted. I must qualify that last statement. Even though we have painted several rooms in our house and one twice, this was the most complex one thus far. It entailed not only the hallway but also the staircase wall, the upstairs landing as well as an off-shoot of the front hallway.
I have to say, once it was all painted, Bub and I love it! And even before it was all finished, I knew that I did not want to repeat the willy-nilly mess that was before. I wanted it to look nice. So, I began looking for advice on how to do it on Pinterest, of course. I found some solid advice here. I followed her instructions and I am so very-very glad I did.
This is it: trace and cut out each of frames not forgetting to mark where you nail needs to go. Bam!
 The process was silly simple. But, here’s the catch: I had over 100 frames to trace and cut out. But, it was worth every single one! I also went a step further because I had so many frames- I labeled them so that I would know which cut-out was which. Then I used painter’s tape to arrange all the cut-outs on the walls. And this time around, I decided to do some frames going up the stairs rather than just in the front hallway. So, technically, I did 3 separate gallery walls.
 In a way, hanging the cut-outs was like playing Tetris- just on a life sized playing field!
Once I got all of the cut-outs hung, I was ready to start hanging the frames. I had a friend who advised that I put all my black and white photos together and all my colored photos together but Bub and I decided we like them mixed. Bub and I also decided we liked the photos of both our families and friends being mixed. You might find a black and white photo of his great-grandparents next to a color photo of my best friend and her sisters or vice versa.
I started with the big frames first and then worked my way out. This way if anything didn’t hang just right, I could adjust.
 And I have to say, I was so pleased with the outcome! They look thought out and planned and what do you know?! They were! I love them. Bub does too and so does Moma.
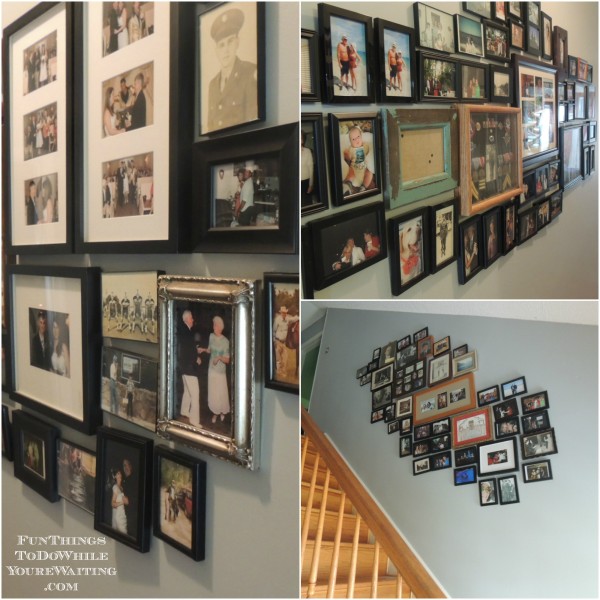 The outcome was so worth all the tediousness of tracing, labeling and cutting out all those frame patterns. I will always do it this way when ever add more because there is certainly room to add more! I highly recommend using this technique if you do a photo gallery in your house- this makes it so easy!


You can find me linked at…

http://thebrambleberrycottage.blogspot.com/2013/11/time-travel-thursday-174-talented-time.html


One Comment