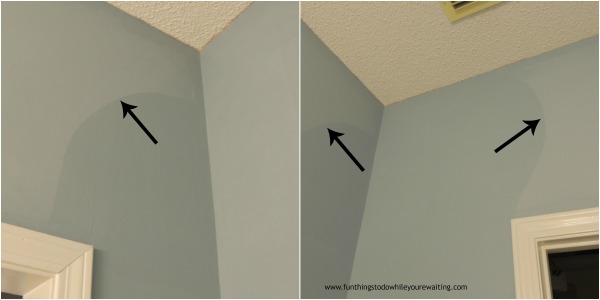
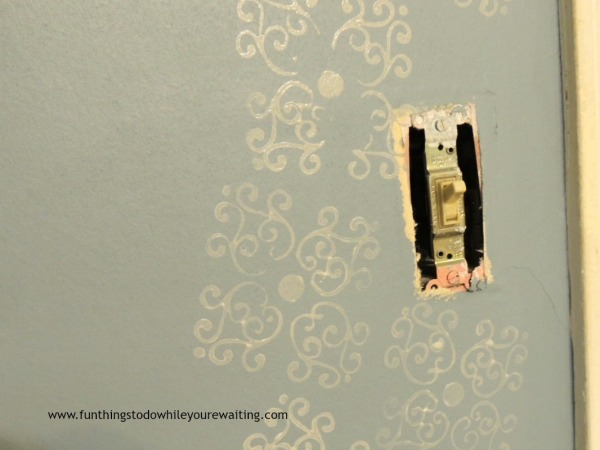
When Bub and I moved into our house- we were first time homeowners. The previous owners’ style, I like to call 1991 Country Chic. Their primary color palette was beige- beige walls, beige wall paper, beige counter tops, beige floors, beige. We came in like gangbusters removing wall paper and painting. We had no concept of cohesive color palettes.
We have tackled the rest of the house room by room. We tackled the master bath about 2 years ago- picking a color that no more matched the house than the man on the moon. But, we liked the color on the color swatch. We still had no idea of color cohesiveness.
And then it came time to paint the hall way. We decided to paint the hallway one shade darker than the kitchen. We were starting to understand color cohesiveness. And oh my! The bathroom color next to the hallway was almost offensive! So, we decided to paint the bathroom one shade darker than the hallway, 2 shades darker than the kitchen on the same color swatch.
It took us forever to actually paint. We lived for at least 6 months with a couple squares of the proposed paint on the walls. It was long enough for a friend to visit and tell me that it was too dark to paint in there. Too late, we had already bought the paint! So we painted the master bath and loved it! There is a little dressing room attached to the master bath with the master closet (aka my closet- Bub has his own closet on the other side of the master bedroom).
This little dressing room was home of the last wallpaper in the house. And I wanted to do something loud in there. I started following my own instructions on how to remove wallpaper– tried and true. But, it was like a scene out of my worst nightmare! I started under the dressing table- first layer of wallpaper, 2nd layer of wallpaper, layer of paint, 3rd layer of wallpaper, 4th layer of wallpaper and then the top layer of Sheetrock!
I just wanted to crawl in a hole and not ever come out! When you peel off the top layer of Sheetrock, it means that you are going to have to Spackle and sand and even then your walls may not be nice and smooth and awesome. As I was sitting there wondering what the hell I was gonna do, Bub came in and said- Just Paint Over the Wallpaper. Wah?!!? That goes against everything we have ever done! His logic was that since I was the primary user of this little space, if it turned out janky, I would just have to overlook it. And just like that- the weight of the world lifted!
I got down to business. There were places on walls that I had already peeled the top layer of wall paper off. Bub helped me sand those edges, and Spackle a couple places that need attention and then I started painting. And I thought I might be coming out of the gate with having to turn a blind eye- because I could see the layers of wallpaper under the paint.
But, the paint dried and those contrasts vanished! Bam!
But, I was not finished with this little room. Even with all the wallpaper removal drama, I still love busy walls- I do. I came up with a wallpaper alternative- using a foam stamp to create busy! I used some paint one shade lighter on the color swatch (the color of the hallway), a foam stamp and sponge brush to stamp a design all over the walls of the dressing room- much like I did with my paisley stamped shower curtain– which I still love.
And when it was finished- I loved it! It gave me a wallpaper look without having to deal with my future self cursing me!
Yep. I love it. And at the end of the day, hindsight is 20/20 but maybe we should have tried painting over wallpaper at the very beginning of our wallpaper removal journey. Oh well! Do you have any instances of hindsight being 20/20 in your home remodel journeys? As always, we want to hear about it.
Update 4/22/15: Honestly, I had forgotten that I painted over the wallpaper- if that tells you have noticeable it is! And I still love the business of the foam stamp art- and I know what if or when I get tired of it, it is just a matter of paining over it.


2 Comments