
I am a super-feminist. Women can do anything and everything they set their minds to– and don’t even try to stop them. We can run countries/businesses, create life, and go to space. Ladies have come so far– although a lot of the world still has a long way to go. Despite our advancements, however, I often think back to the roles and tasks women were generally assigned to in the past with some fondness. I often think I would have made a good “Lady Leigh”… doing beautiful needle work and working on my tapestry whilst the lords were out doing lordly stuff– like killing dragons, or whatever. I have always had a certain proclivity towards the crafting. I just get a kick out of learning new techniques/crafts and making things with my hands and imagination.
In my FTTDWYW bio, I mention that I love archaic needle crafts. I knit. I sew. But, ever since my grandmother taught me how to cross-stitch, I’ve loved embroidery. For one, it is one of the cheapest crafts you can perform. Sewing is super-expensive, and if you get involved with a large-scale knitting project, it can really add up (especially if you are using nicer yarn). Embroidery floss, on the other hand, is dirt cheap. My mom gave me a $30 Michael’s gift card last year for Christmas and (even after several projects) I still have a $4.30 credit on the card! You can use pre-plotted patterns, but I (personally) love what I call, “free-stitching” and creating my own designs. If you are interested in getting in the stitching-game, you need to pick up Jenny Hart’s Sublime Stitching: Embroidered Effects. I have quite a craft library, with everything from vintage compendiums to Martha Stewart Craft Collection Series, and of all the embroidery tutorials hers are the best–easy to follow, super inspiring, and encourages you to think outside the traditional embroidery box.
I’ve recently completed two embroidery projects that I wanted to share with you and give you an idea of what goes into completing a project– if embroidery interests you, that is. In addition, I’ve got three (yes THREE) other DIY projects to share. Get ready… this post is going to be a long one!
After hemming and hawing for two months over where our “art” should hang in the living room, I’ve finally pulled the trigger and started putting stuff up. I’m slowing working on decorating the living room (a later post to follow) but knew I wanted to put my embroidery up in the entry-way. One of these days, when money isn’t an object, I would like to think that my tastes will skew more sophisticated… but, for now, I just have to revel in the fact that I like bright, happy colors, and kitschy stuff. Cruising through Pinterest, I have seen several design inspiration pins on how to create a gallery wall. I had also seen several suggestions to frame fabric you like in embroidery hoops and hang them IN the gallery. Why just frame fabric when I could do awesome stuff to it?!
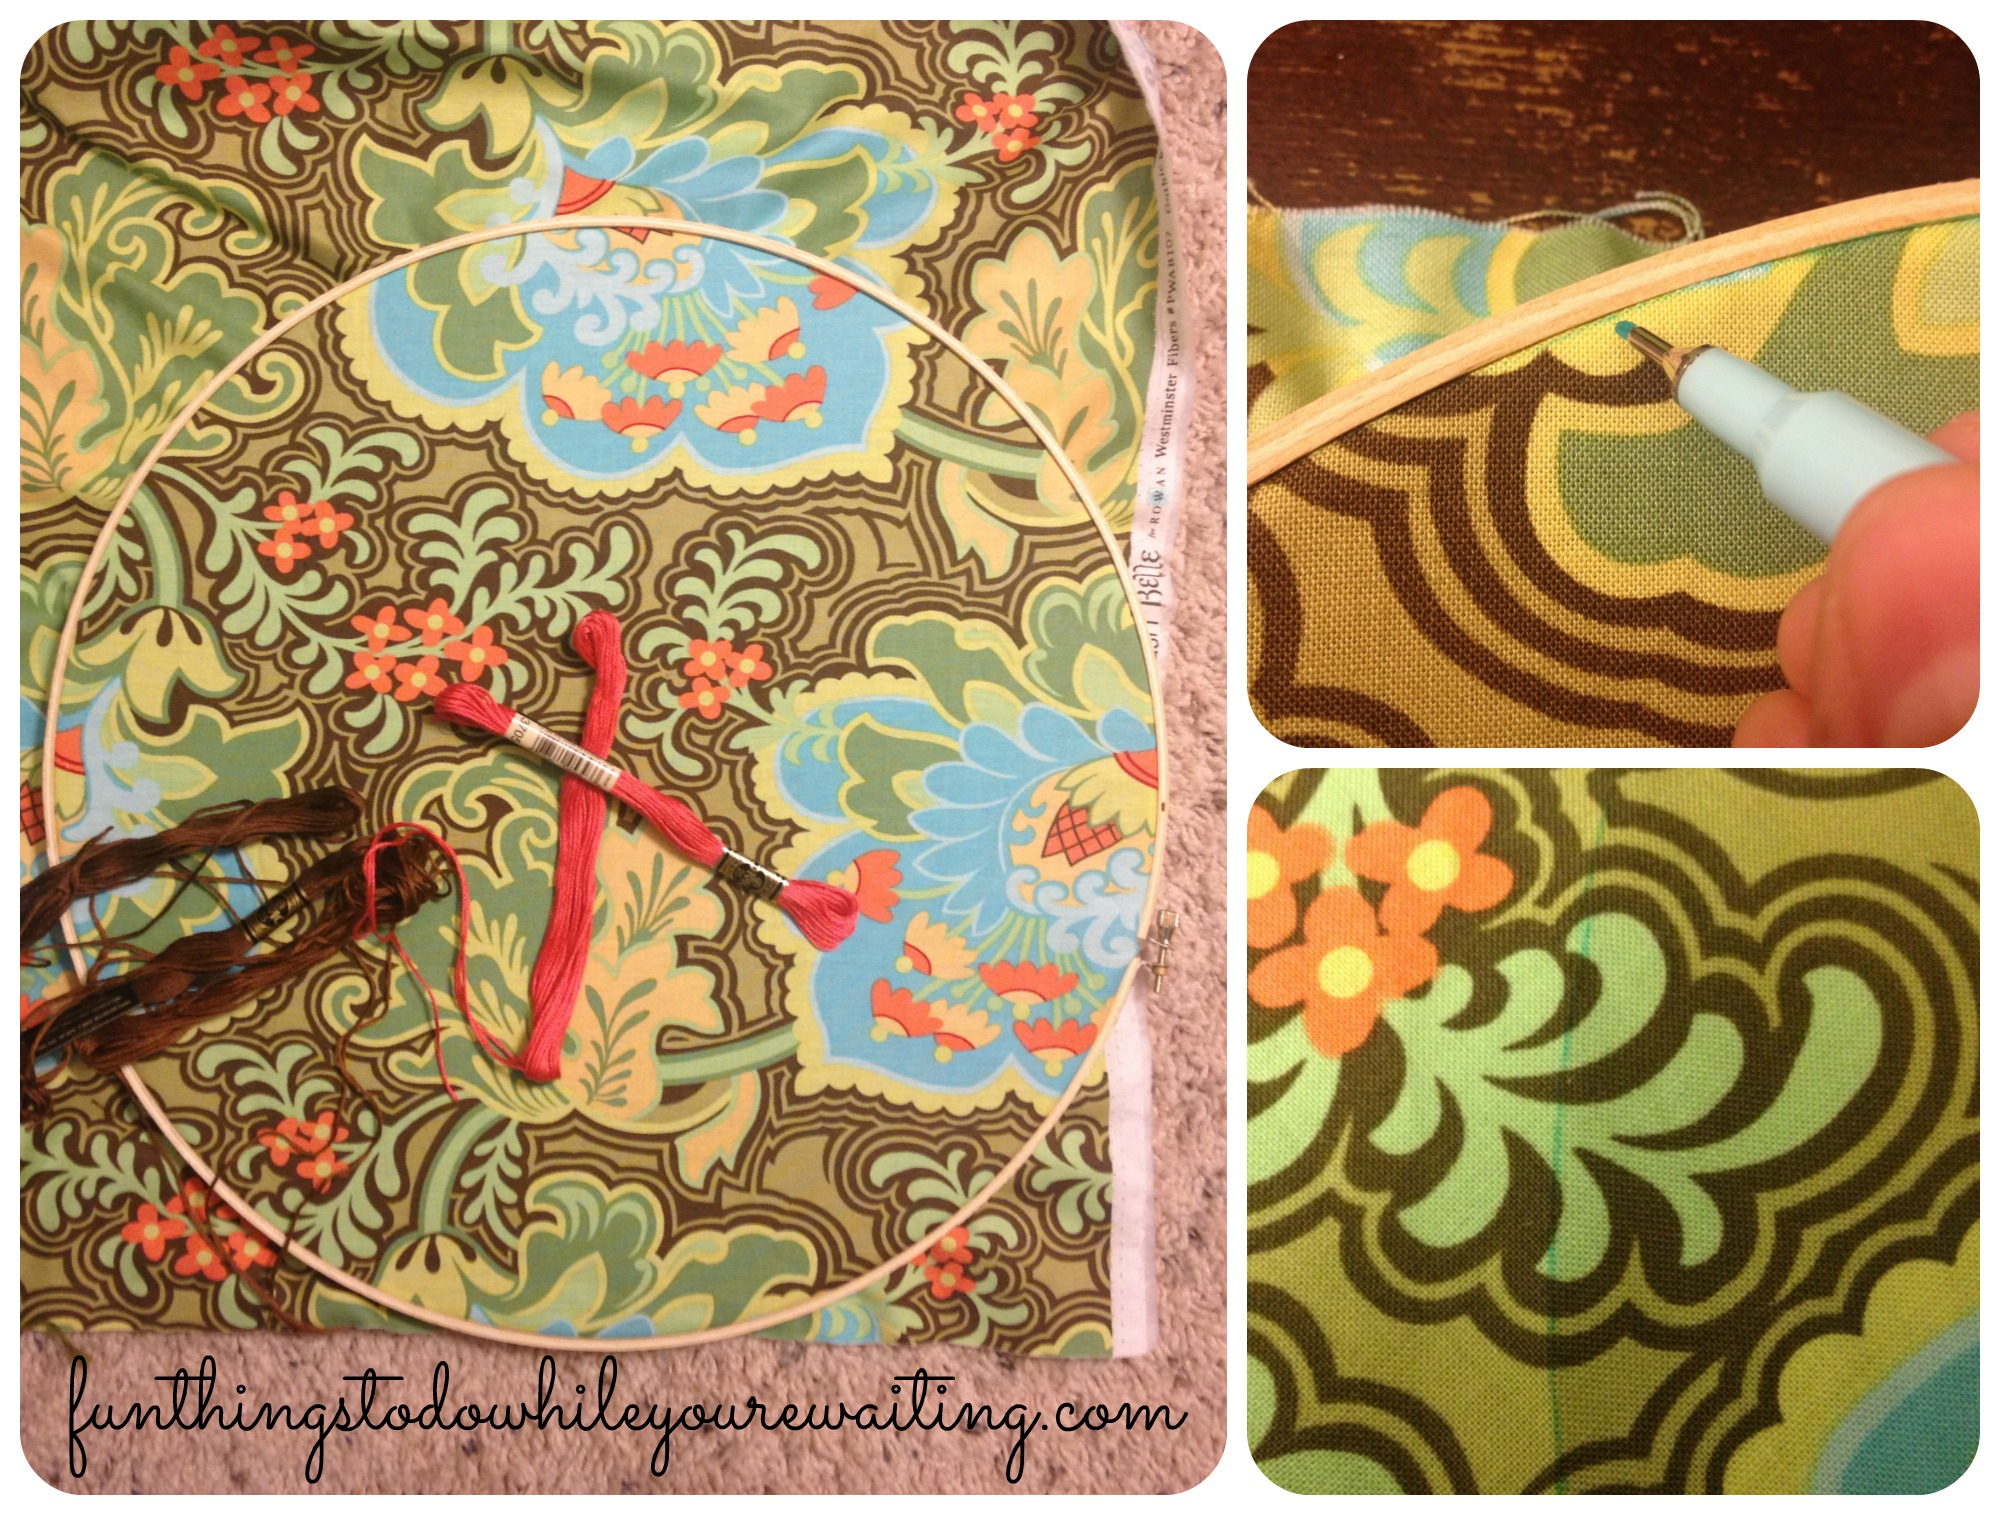
If you have been following the blog, you’ll know that I found an awesome print a few months ago that inspired my living room paint colors and found it’s way onto a lampshade I recovered. Although I still have plans to do pillows on the horizon, I knew that I wanted to use this fabric to do one of the gallery hangings. I had some embroidery hoops on deck that I had gotten on the cheap back in Chicago. I am a craft hoarder, saving things that I hope one day will come in handy. Saving something with hopes to use it later is typical hoarding logic, but I actually DO use a lot of my stuff– more on that later in the post! So, I took my muse fabric, threw it in an embroidery hoop, and then used my water-erasable, fabric-marking pen. The pen is great for sewing and all fabric crafts. If you are a crafter, I highly recommend picking one up. It marks in blue but comes out easily when exposed to water. I used the pen to draw around the outer-edge of where the fabric meets the hoop. I did this because the hoop was large and less-sturdy– I knew that if I wanted to embellish the fabric, I would want to use my smaller, sturdier embroidery hoop. By drawing the dimensions of the framing hoop, I knew what areas I needed to embroider and which ones were outside the hoop and could be left unadorned. In the below collage, you can see me framing the fabric and matching floss, drawing the line, and how the line looks once the hoop is removed.
Now, flash forward a month and half, which is how long it took me to embellish the fabric. All I did was follow the pattern of the fabric… I used satin stitches for all of the brown, scroll work (which wound up being a bigger deal than originally anticipated), French knots for the flower centers, and back stitching for outline work. I knew that I wanted to spray paint my embroidery hoops, giving it an extra pop of color, so that is what I did. If you live in an apartment, or don’t have a garage/yard, spray painting is actually harder than it sounds. Fortunately, cardboard is something I have a lot of after the move. I set up a spray painting station out on our porch (where it was well ventilated) and got to work on spraying the frames coordinating colors.

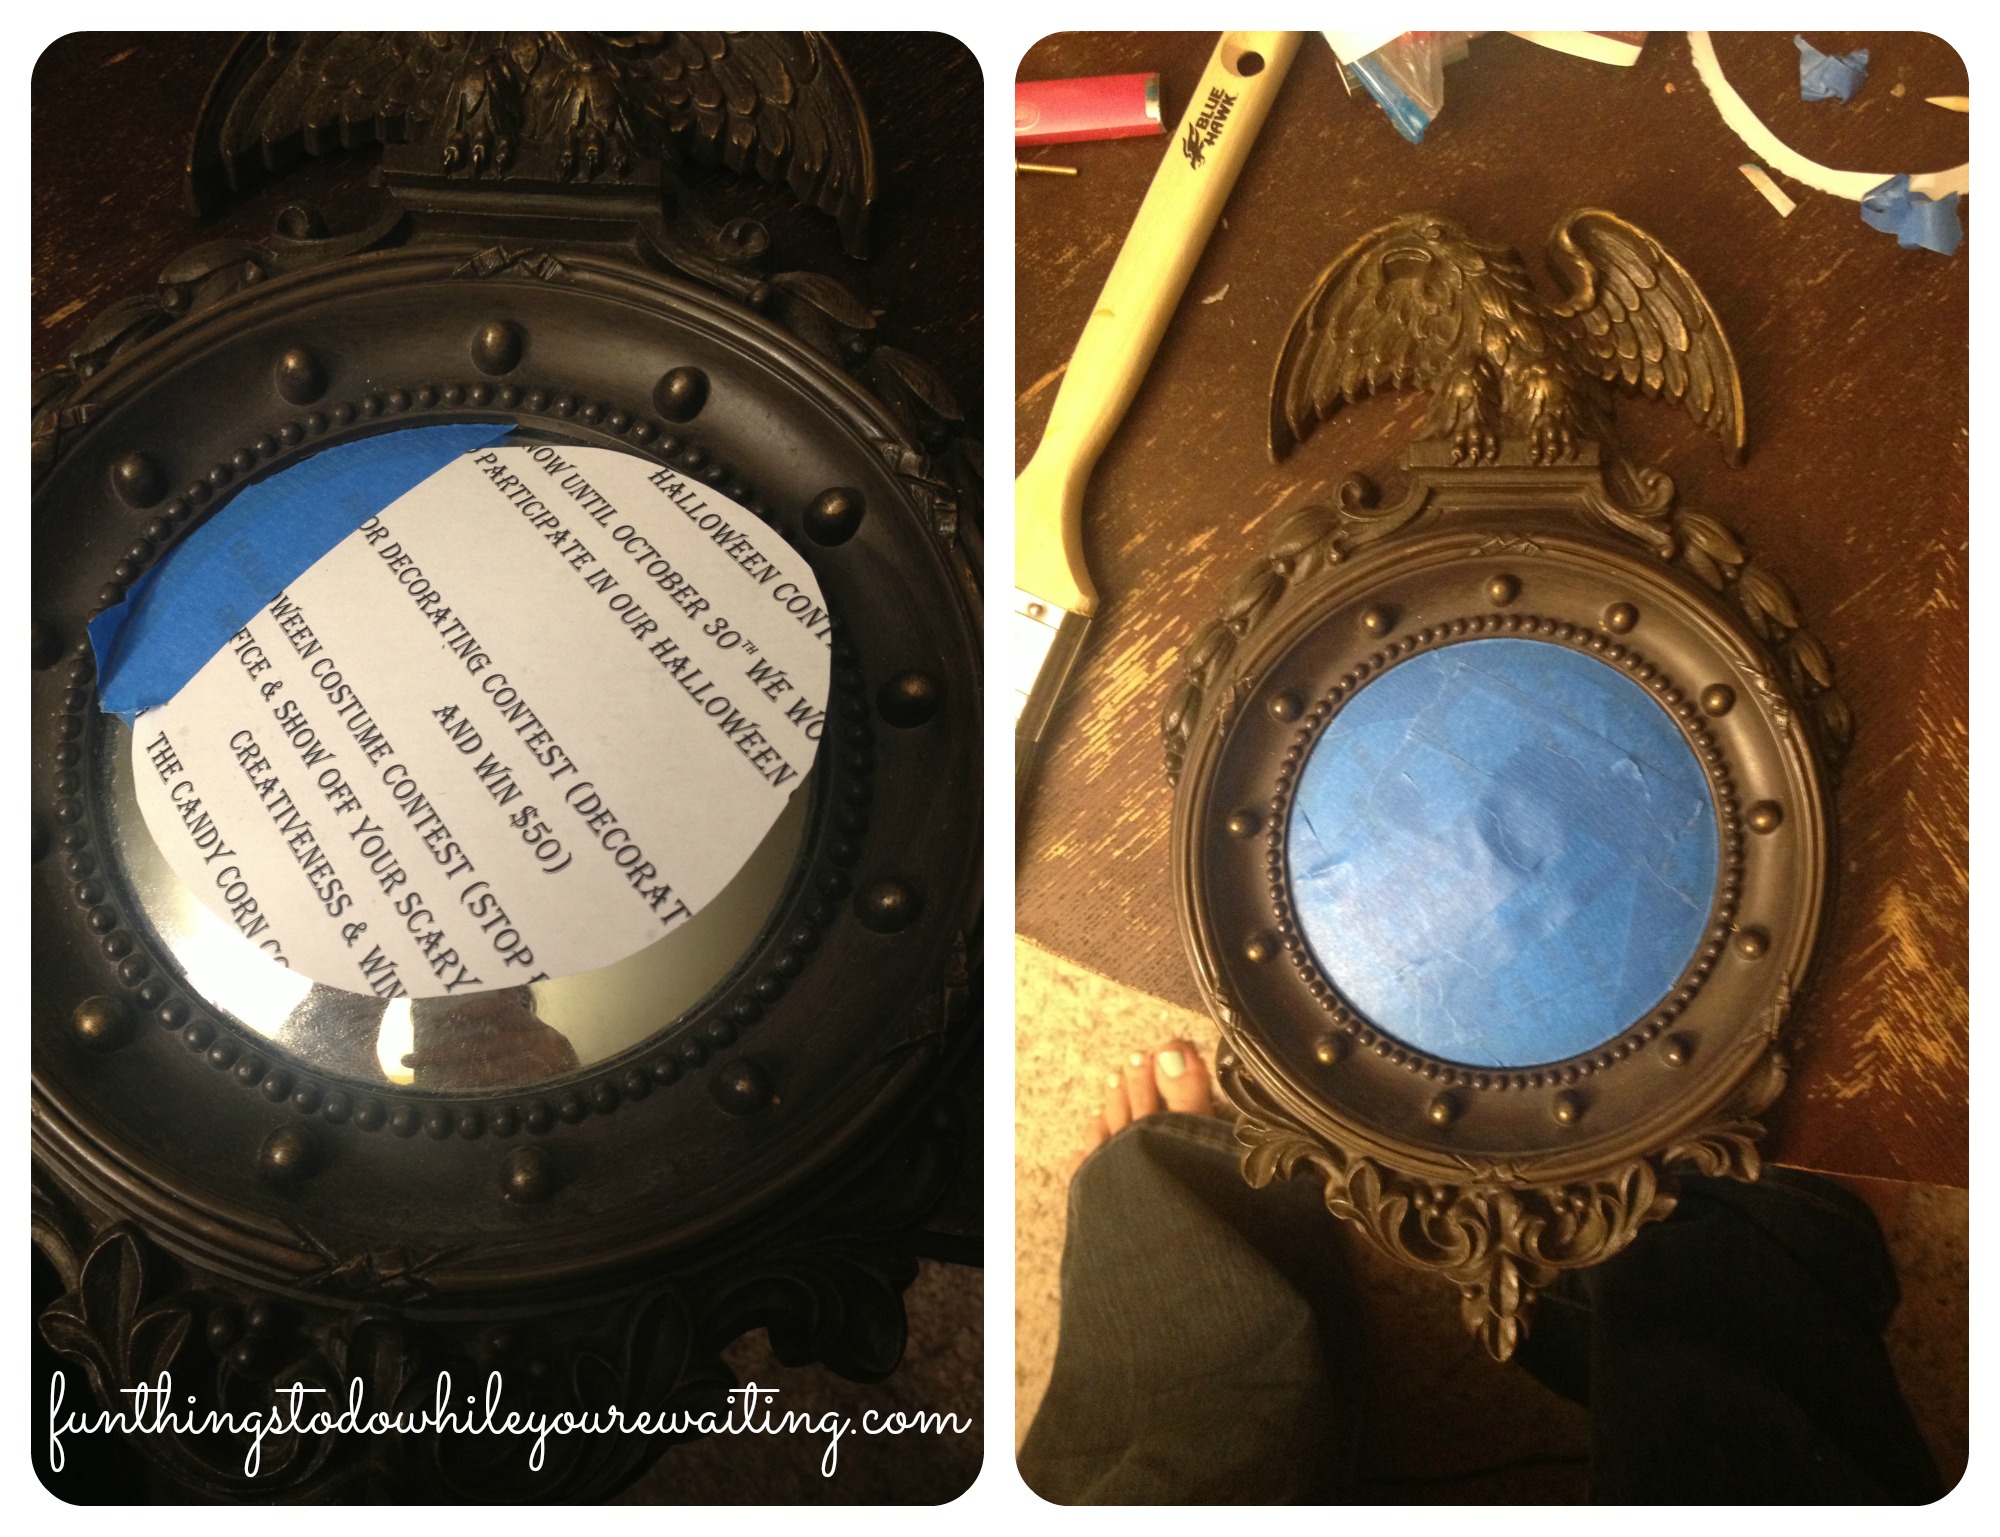
You will notice the citron colored object in the right. I found this funky mirror in a thrift store for $4 months ago and knew that I wanted to include it in my gallery wall. Since there is a fish-eyed mirror in the middle of it, I knew I had to tape it off, which is easier said then done. To effectively tape off the mirror, I got a scrap piece of paper, placed it over the mirror and then trimmed the excess paper off with an Exacto knife. Since I needed to tape the paper onto the mirror, I then trimmed the paper with my craft scissors to make a slightly smaller circle. I then used painters tape, taping around the edge, using a mechanical pencil tip to push the tape into the ridge, and then again used the Exacto knife to remove the excess painters tape. I then repeated the process several times until the circle was complete. I then used some more painters tape to cover the rest just in case the paint bled through the paper.
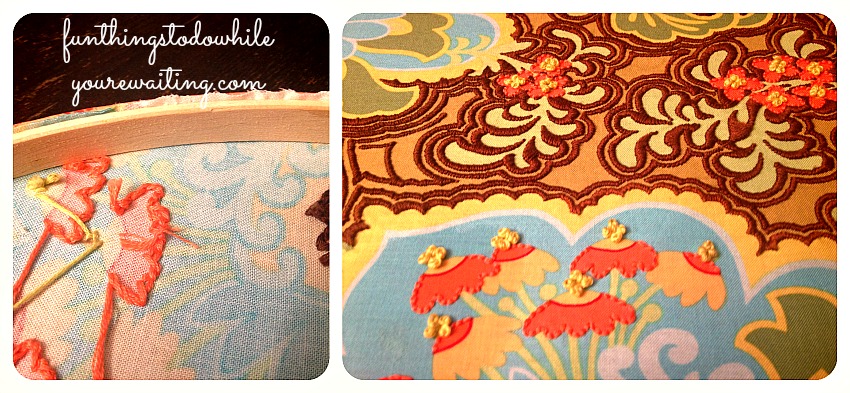
After I spray painted the objects, and let them dry overnight, I was in entry-way gallery bidness! I, initially, just tried to put the fabric back into the hoop, but it kept moving around and I couldn’t get it how I originally had it before I had embellished it. Since I knew I would never be removing the fabric from the frame, I used some Elmer’s Craft Bond Spray Adhesive to secure the fabric to the hoop in small sections until I had gone all the way around. Be careful not to get any of the adhesive on any fabric that is going to be visible. I sprayed small sections of the frame and then wrapped the fabric around it. Once the fabric was secured and followed my original blue-lined pattern, I THEN put the outside portion of the hoop around work and secured the screw. I then flipped it over, and trimmed the excess– since, again, I knew I wasn’t going to remove the fabric from the frame. Below is the back of the piece after it has been trimmed, and then a close up detail of the stitching… in case you are into that kind of stuff.
 Here is the finished project!
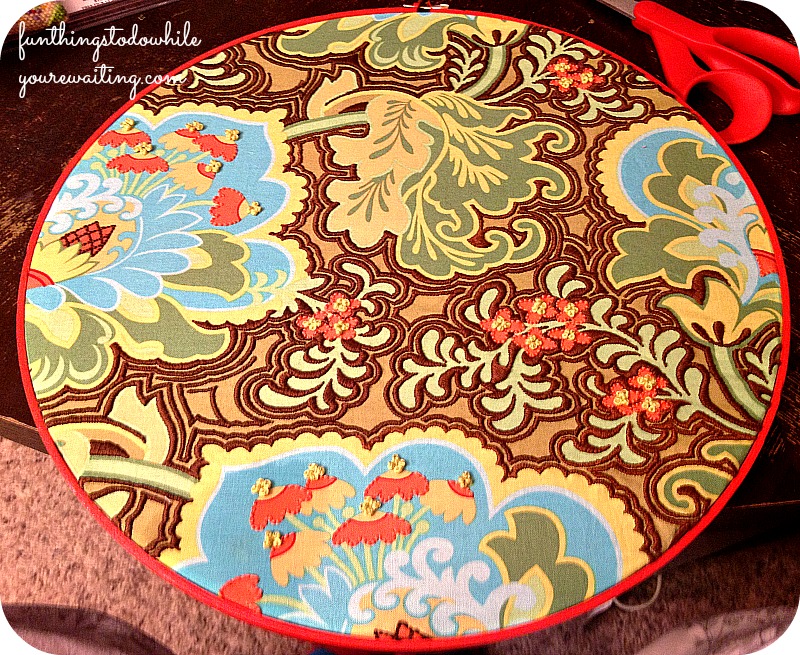
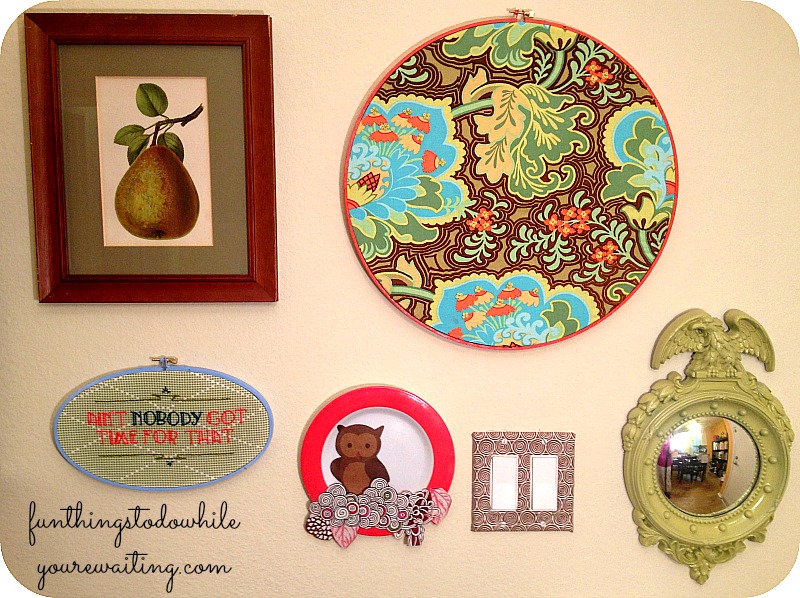
I am obsessed with the coral frame and really love it! My second embroidery piece follows the same process as the above… kind of: put desired corresponding fabric in frame, draw blue line around hoop to establish parameters… Here, however, is where things deviate. One of my favorite craft movements is subversive stitching. Embroidering really silly phrases, or items that normally wouldn’t deserve to be embroidered. I’ve always had in the back of my mind to do one, and finally had the chance. I took for my inspiration a quote from a viral video that gets quoted quite frequently in my family. I wanted an art deco feel, so I researched fonts and found one that I liked. This process also taught me how to download and implement free fonts onto my computer- score! Once I had the font downloaded, I created a word document and arranged the phrase to my satisfaction. I then used a ruler to draw guidelines on my fabric and then used my fabric marking pen again, to sketch the lettering. I did it by hand, and I’m sure there are easier ways to do it if you don’t feel confident in your hand-lettering skillz, but this was just MY process. I also found some art deco flourishes to round out the project. I used back stitching for the project, then secured the fabric to the inner hoop frame with the spray adhesive, and then trimmed the excess on the back like the other project. Here is the final product.
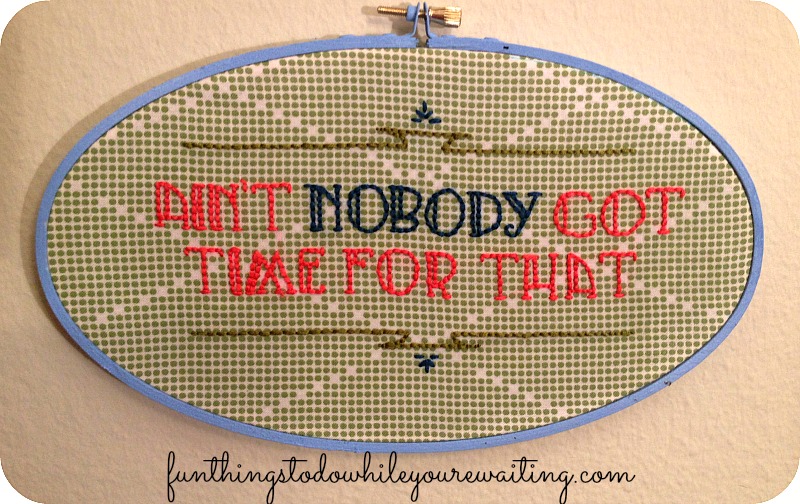
The project is sliiiiightly off-center due to pulling the fabric too taught, but you know what? Ain’t nobody got time for that. Also, I acknowledge that embroidery is ALSO something that a lot of people don’t have time for… but, to me, it is a stress reliever and outlet for my creativity.
So, now I finally have all my elements together for my foyer gallery. Heh. Foyer. I wish. I laid everything out on the floor to arrange it how I wanted it to go on the wall and started hanging. I then transferred the pieces to the wall and noticed two things: there was a light switch in the middle of the wall, and I was missing a small piece of something to round out the project.
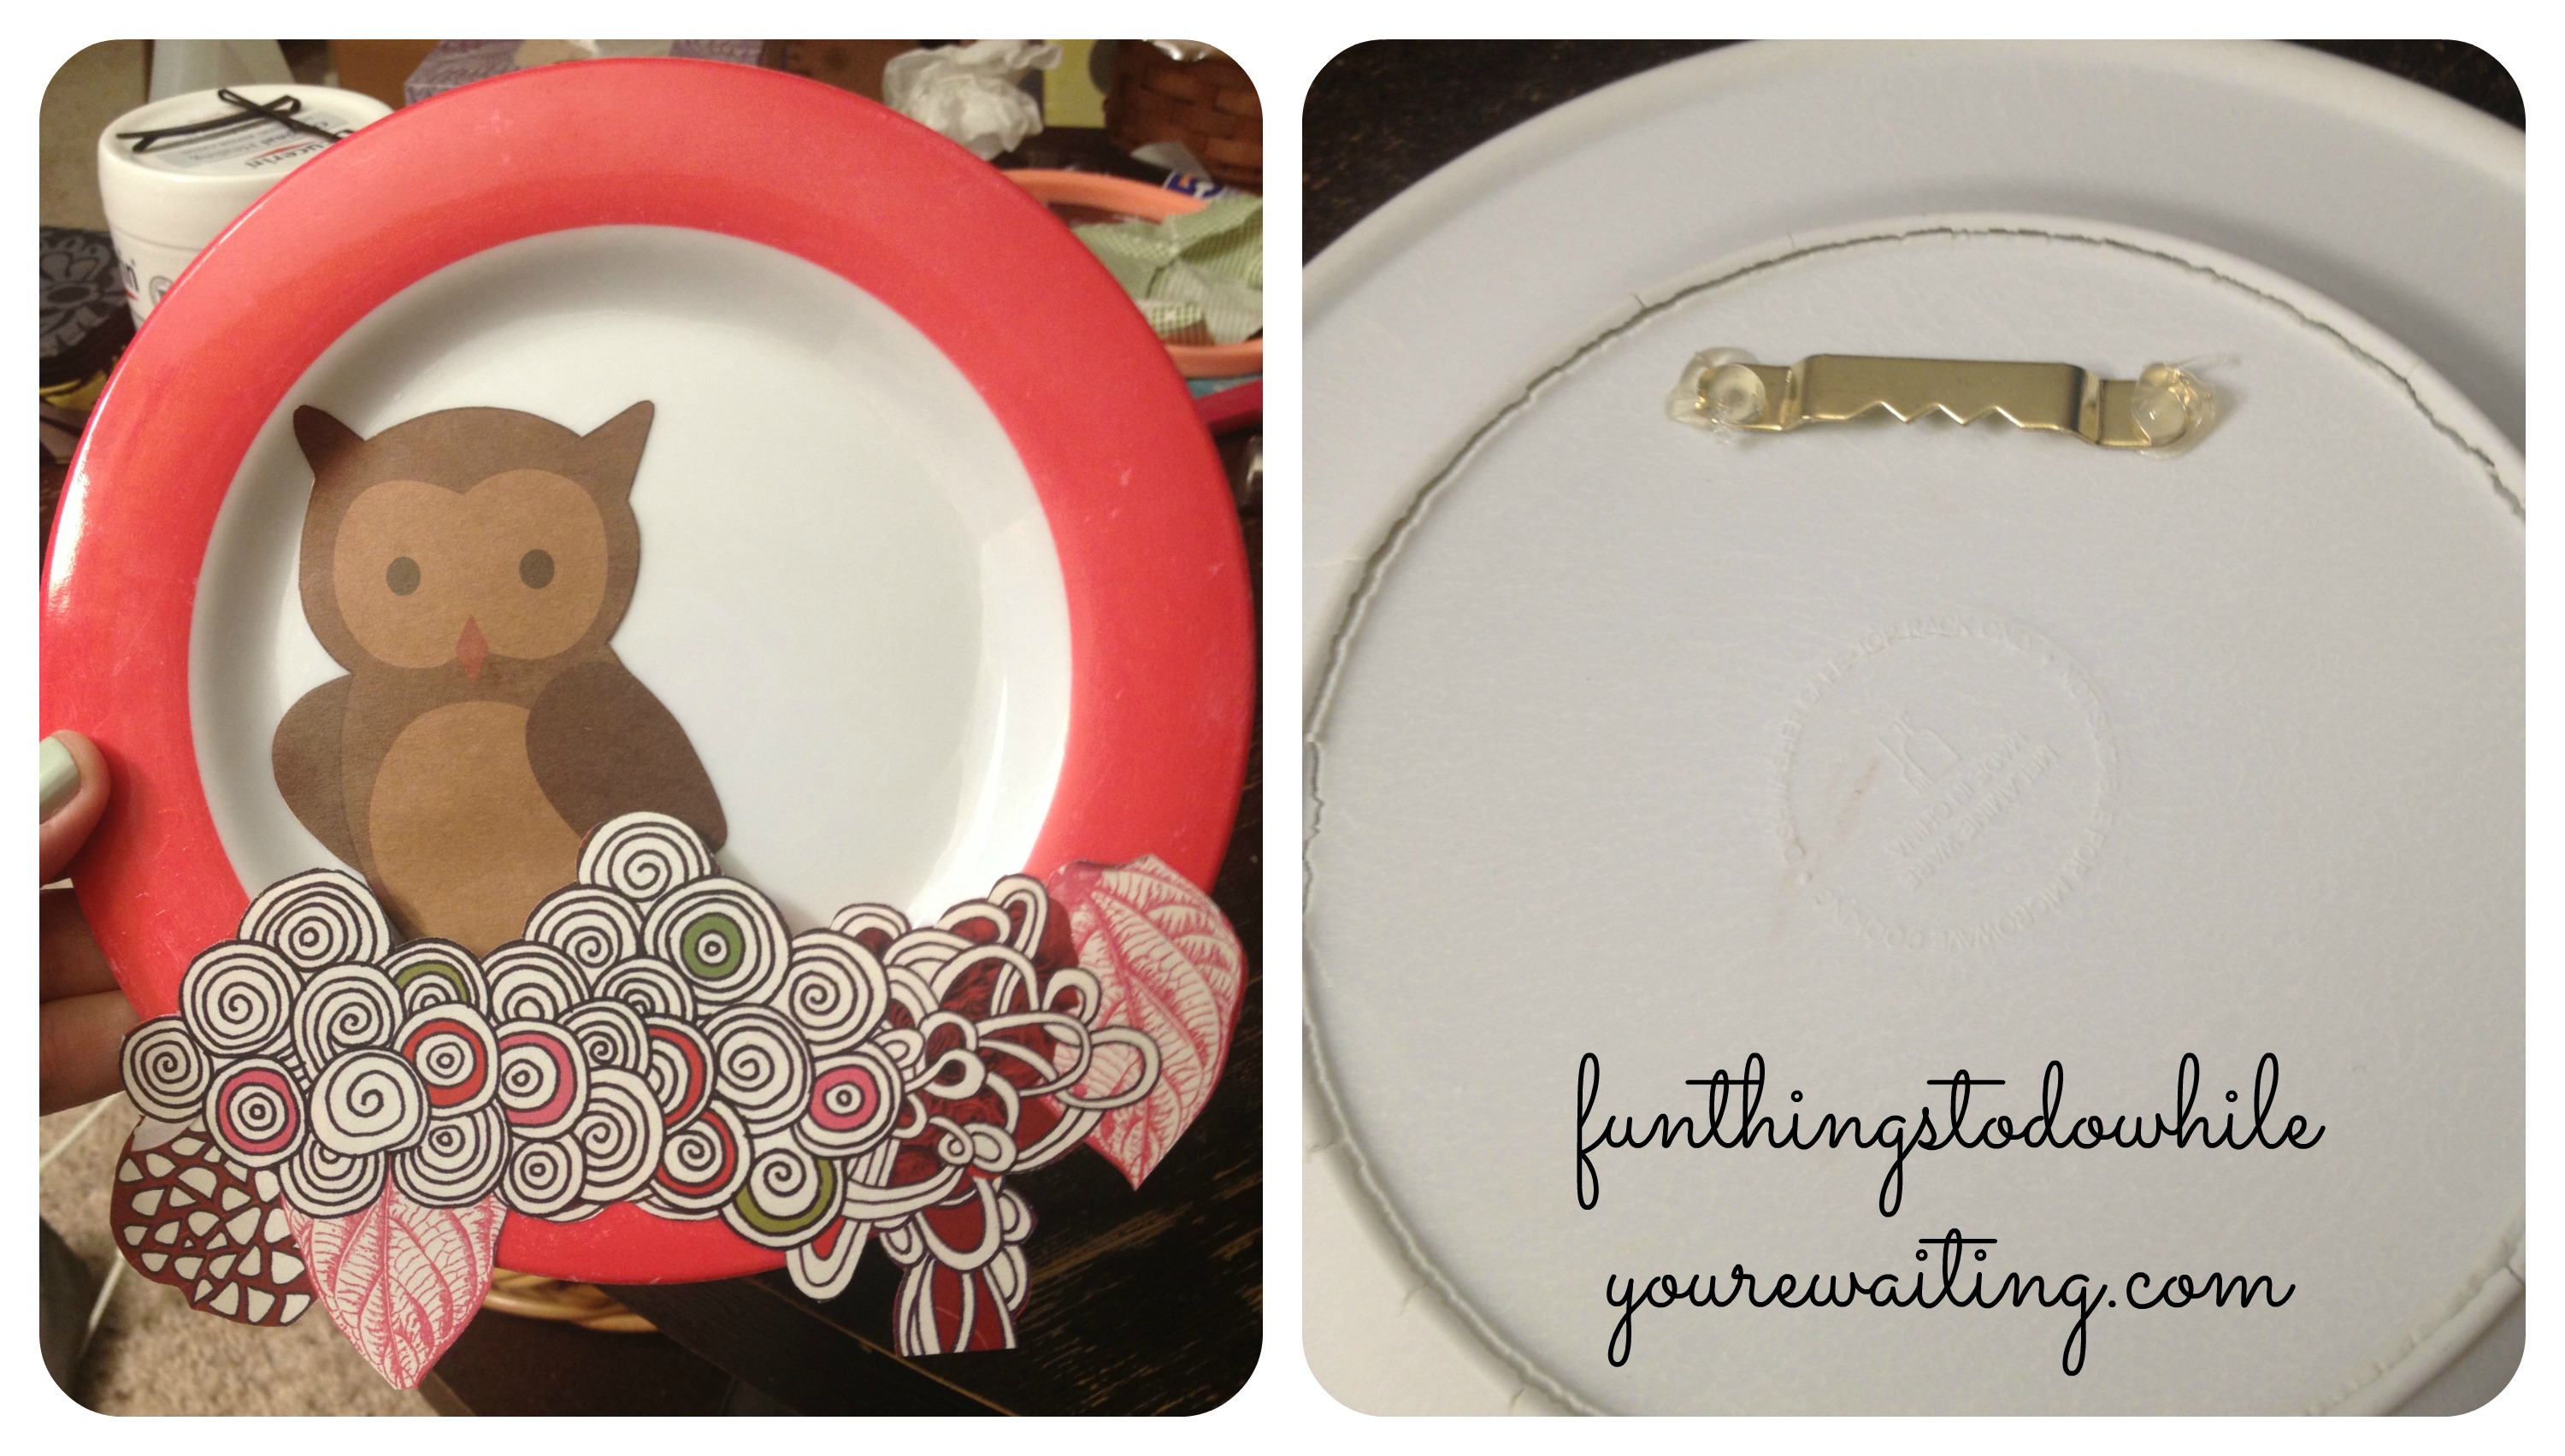
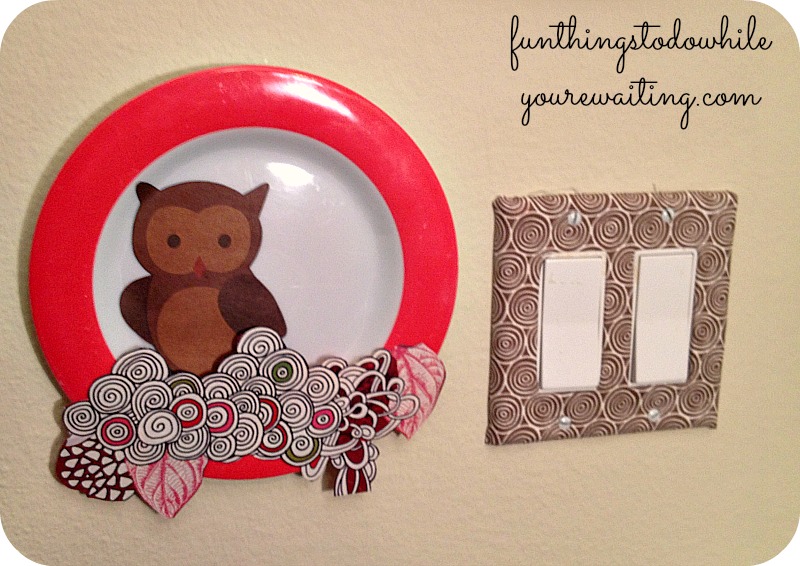
Here is where my craft hoarding comes in handy. If I see something cool in a magazine, I clip it out. I have a big folder of literal clip art just waiting to be used one day. Additionally, I have some plates and china that have been either damaged by the dishwasher or by Josh that I thought I might be able to use someday. TODAY WAS THAT DAY! I had a cute little saucer that had been rendered un-useable for food stuffs, but had a cute coral colored rim. I then searched my clip art folder for something that would fit and would match. The owl is from some adorable wrapping paper my friend Zach used to wrap a present for me several Christmases ago (see the hoarding) and the filigree work was just something I found in Vanity Fair one time. I, again, used the Elmer’s Spray Adhesive and attached the paper to the plate. I then attached a picture hanging apparatus to the back of the plate with hot glue so I could hang it.
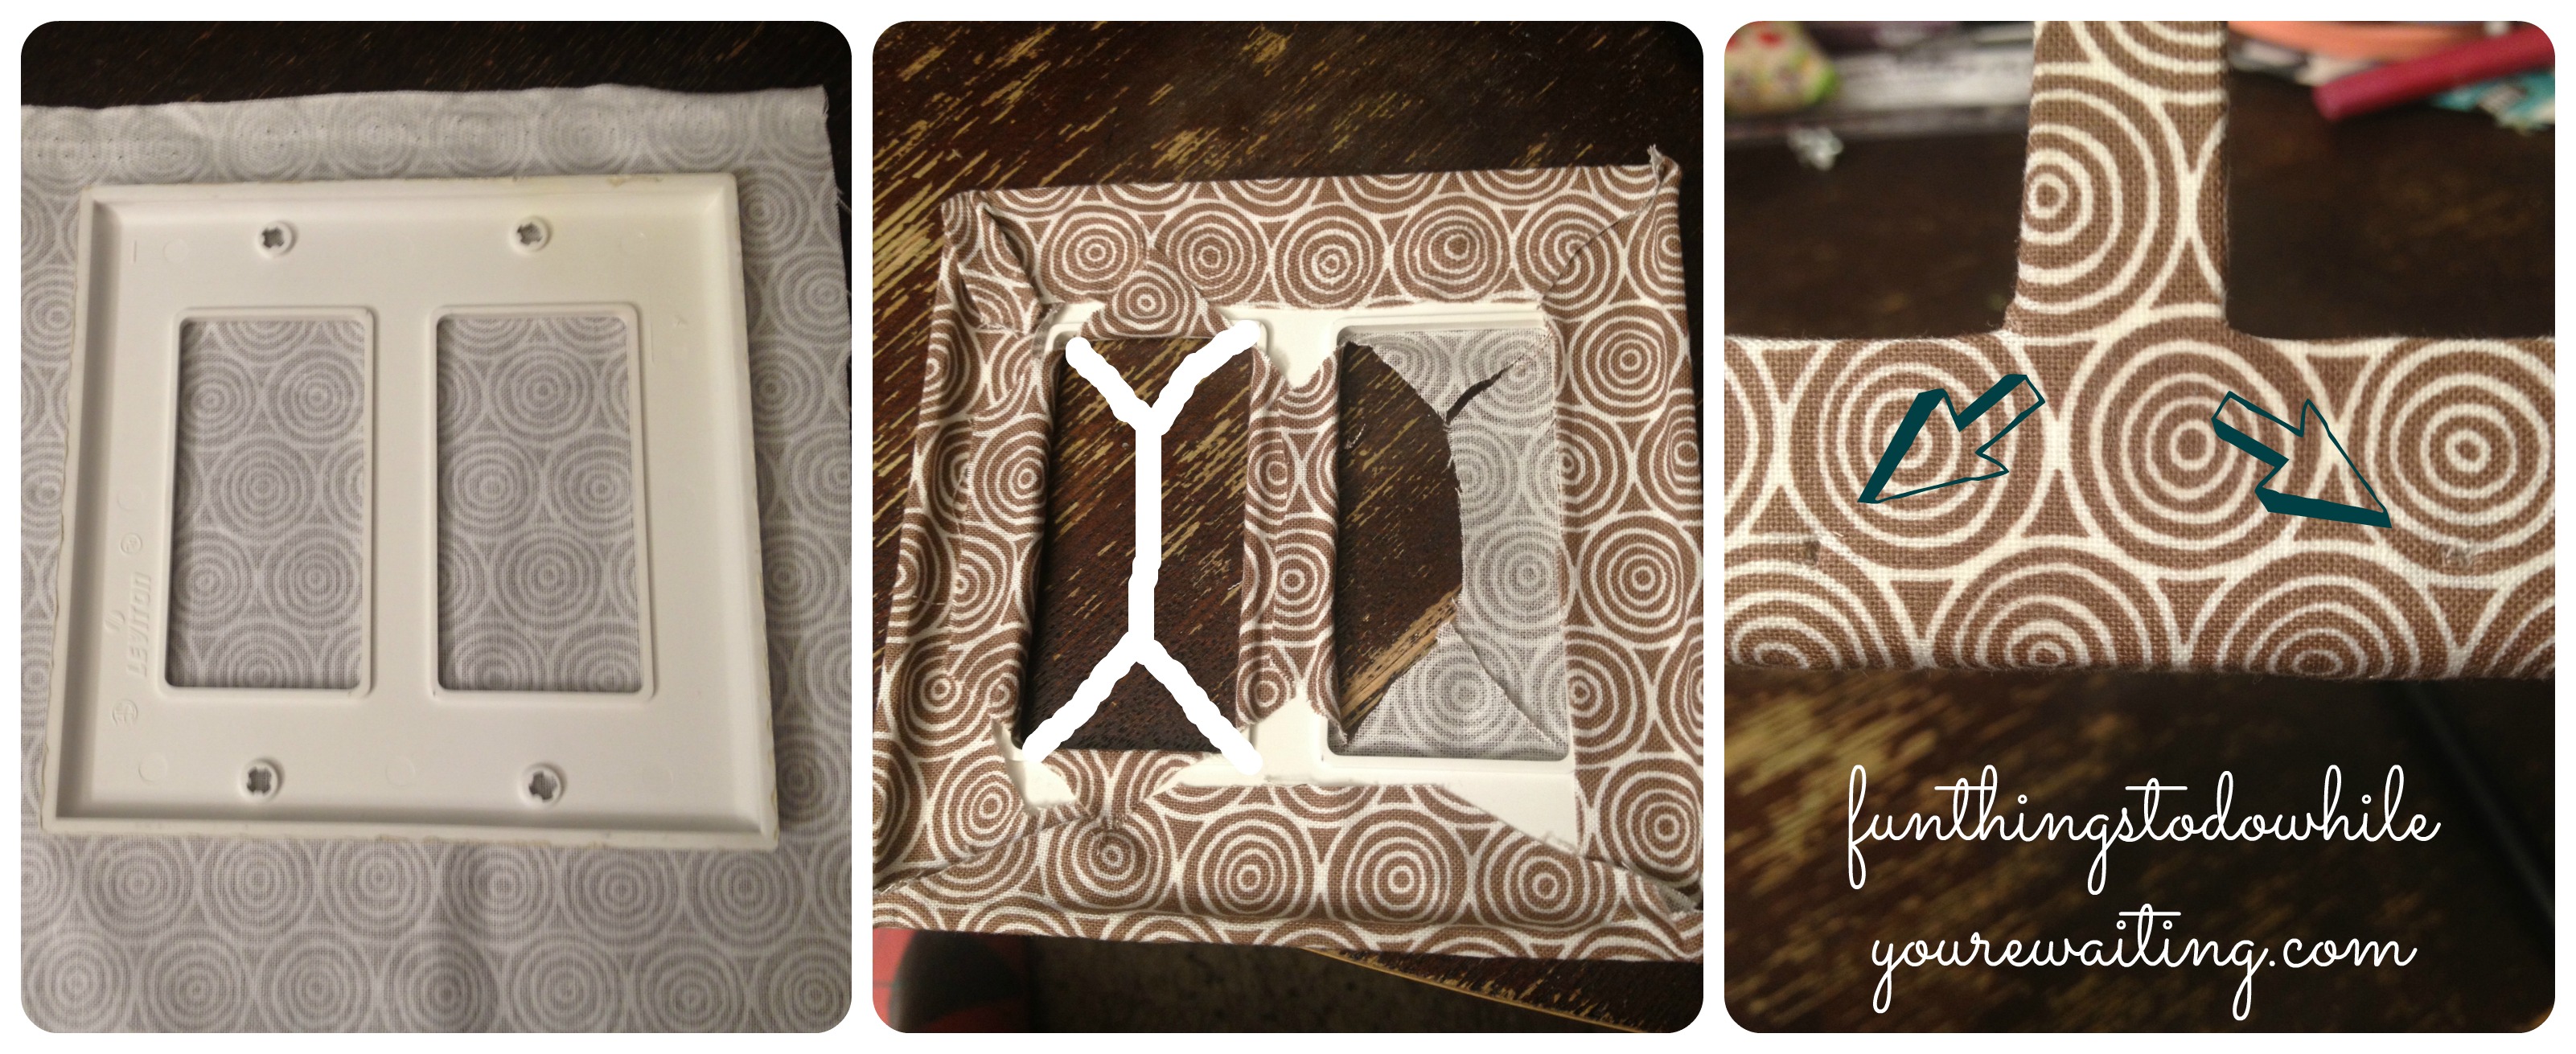
Next, I unscrewed the face plate from the light switch and covered it with a DIFFERENT corresponding fabric. This was crafting on the fly, people! AGAIN, I used the Elmer’s Spray Adhesive. This whole post should be sub-titled, “My Night with Elmer (‘s Craft Bond Spray Adhesive)”… it was my go-to item! I sprayed the fabric with the glue, placed the faceplate face down on the fabric and then folded the fabric over it. To fold over the interior, I bisected the angles and also cut down the middle– again, with an Exacto knife. I’ve drawn (in white) the lines below. I then punctured the fabric in the places where the screws would go to re-attach the face plate.
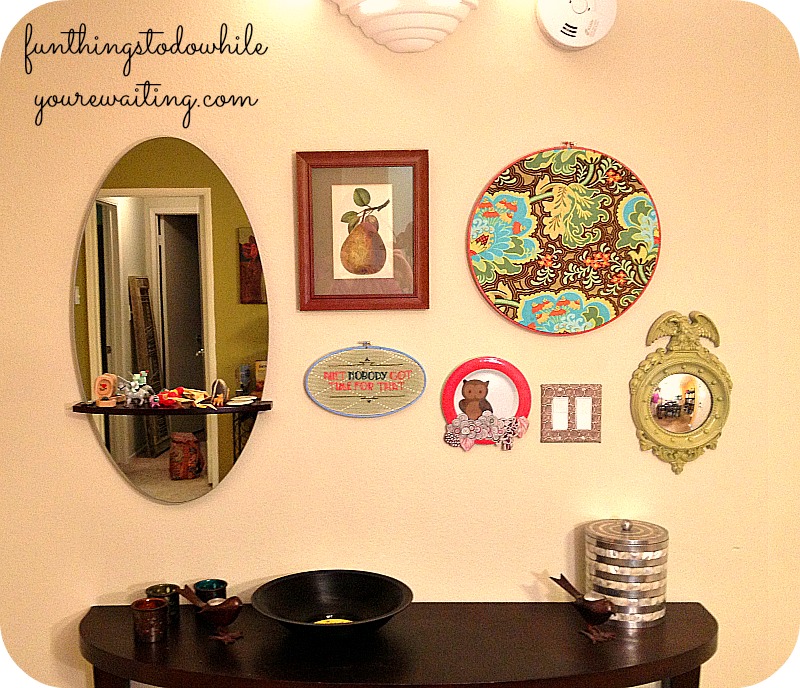
So, here it all is. Finally. I am still not sure what I am going to put on the tabletop below the gallery (a plant? a cloche of some kind?) and hopefully, I will find some more small objects to add to the gallery, but I am pretty pleased! It really brightens up the one wall we decided not to paint!
Here are some more detail shots… because you deserve them after reading all this!
Are you a craft hoarder? Do you like the eldritch arts of embroidery? As always, let us know what you think!!!


Awesome post! I love your embroidery!