
Now that all of my crafting supplies have been unpacked, FINALLY, the crafting can resume! Rejoice! One of the projects I wanted to tackle first was to recover one of our living room lampshades. The lamp/shade was purchased at Target when we were living without our furniture before the movers came and I always knew that I wanted to do something special to it to personalize it into our new place. I don’t know if you remember, but I had found this awesome fabric earlier that inspired all our living room paint colors. I am working on an embroidery project (which I’ll post about later) with the fabric but I also wanted to use it to cover the lampshade. I’ll probably also end up making a couch pillow, as well… but that is a project for another day.
Here is the before and after…
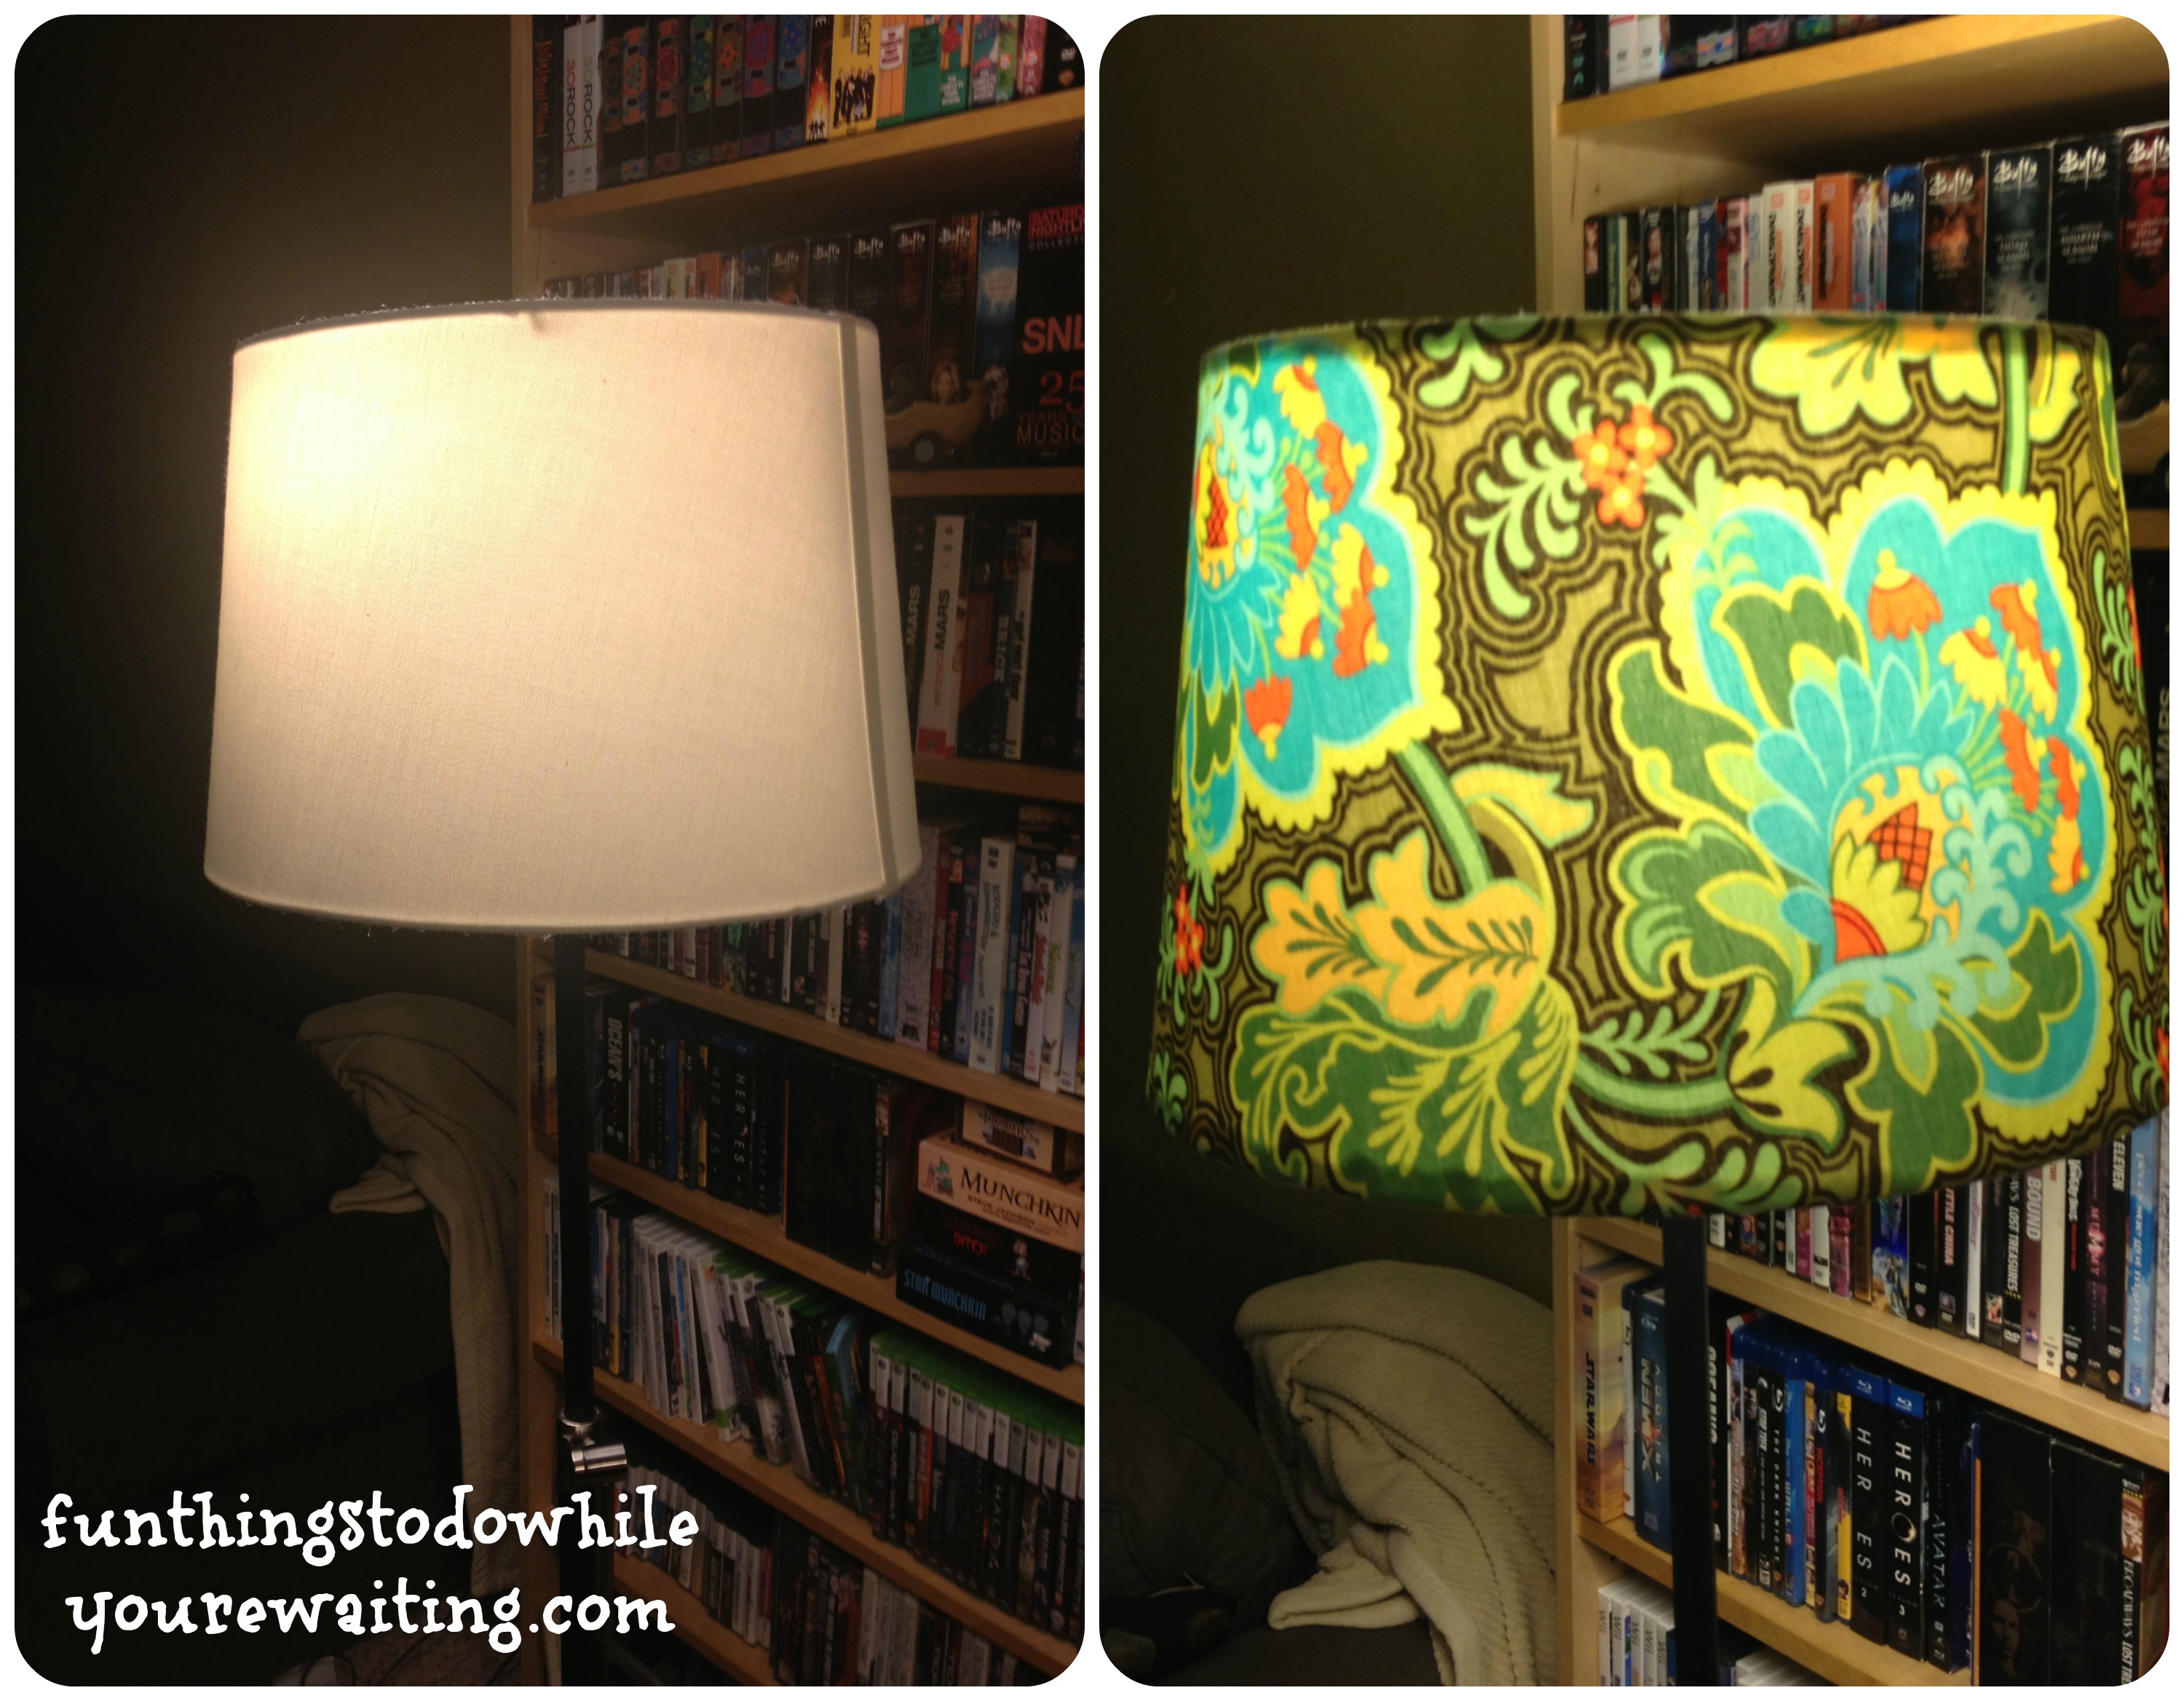 I kind of love it. As The Dude from The Big Lebowski would say, “it tie[s] the room together.” So… how does one do that? How do you recover a lampshade? Great question. I had a pin from Pinterest (of course) that took me to a tutorial on an adorable website called Six Sisters’ Stuff. The directions seemed simple enough. Cut out pattern. Cut out fabric. Use spray adhesive to apply fabric. Glue down edges with fabric glue. Hot glue to finish! I can do all of those things! And I could especially do them now that I had all my crafting gear back!
So, that is what I did. I started by making the pattern. I removed the shade from the lamp and broke out some wrapping paper of which I wasn’t fond. The original tutorial used newspaper to make their pattern, which is great, but if I go through the trouble of making a pattern, I like to keep them for later– in case I want to do this project again. Using janky wrapping paper is actually a trick I use when I am sewing as well. It is sturdier than tissue paper, but still light enough to be easy to work with later. Lay out your pattern paper (whatever you decide to use) and trace both the top and bottom when it is flat against the paper gradually rolling it to the side until you have traced the whole shade. Hopefully, this picture will do a better job of explaining it. Notice the green line in the second picture. That is the tracing line when the shade was touching the paper. Since there is a parabola shape to the shade, it is important to only draw when the shade is touching. Jojo claims there is a math equation that could figure it out… but I told him there was also a permanent marker and some scissors that could also do it.

Once you get your pattern drawn, you’ll want to add about 1/2″ to edge on each side so you’ll have some extra fabric to cover over the edges. Notice the “truncated cone” (that’s Jojo’s term) on the left and the added 1/2″ extra of paper cut above the green line of the pattern. In sewing it’s called a seam allowance. I actually cut something like an inch on the top and bottom… and in the end, it wound up being too much of an allowance… but, we’ll address that in a minute.

Once I had the pattern cut out, I placed it on the fabric, pinned it in place so it wouldn’t slide around while I was cutting, and then cut out the pattern. Like I said, I like to keep patterns I’ve made… which is why I label them- that is what the third picture is below! Also, notice the round hole in the fabric on the first picture below… that is going to be the embroidery project in that future post I mentioned.

I may not have a ton of money right now, but I’ll tell you what I do have a lot of… CARDBOARD. I specifically saved some big pieces from our move for projects. Josh is kind of confuzzled by this, but when you live in an apartment and don’t have a garage or yard, when you want to use spray paint or spray adhesives, cardboard opens up your options– again, a future post. I used a large piece of cardboard for my work surface and broke out not one, not two, but THREE adhesives: Elmers Craft Bond Spray Adhesive, Aleene’s No-Sew Fabric Glue, and my trusty hot-glue gun. All of these things can be found at any craft store worth it’s salt.

I found it easier to spray the adhesive onto the fabric than onto the lampshade and I used a liberal amount– in a well ventilated area, of course. I lined up the seam on the lampshade with the seam on the fabric and thoroughly sprayed the fabric with the Elmers and made my way around the shade pushing out any wrinkles or air bubbles in the fabric. When I reached the end, I folded the edge under and used the Aleene’s Fabric Glue to glue down the edge. Since I left a seam allowance, there was a good inch on the top and bottom for me to work with when I used the Aleene’s again to glue the edges over. I applied the glue to the edge and rolled the fabric over smoothing the glue thoroughly over the entire edge which is the second picture above.

The above collage is of shots of some finishing details. The first one is showing you how to cut the fabric to accommodate the frame at the top of the lampshade. By splitting the fabric, you allow it to be glued to the shade instead of lamely overlapping with the frame. The second picture is of the edge of the fabric being glued over to form a finished seam that I previously mentioned.
Once I got everything glued, I was feeling pretty proud of myself… until I put the lampshade BACK on the lamp and turned it on. D’oh! My longer seam allowance totally showed when the lamp was illuminated. So, the project took one more step. I used the hot-glue gun to make sure the fabric was solidly attached to the edge and then trimmed the overage as close as I could. That is why I mentioned maybe making your seam allowance smaller… though having the larger seam allowance made the trimming easier, in the long run. See the overage and trimming below!

Once everything was trimmed, it made all the difference and it certainly looked more polished! The project was a little bit harder than I anticipated, but still perfectly doable- for any skill-level of crafter. I totally love it and now want to cover ALL THE LAMPSHADES! Hooray for the return of crafting!


4 Comments