
Now that I am at the tail end of unpacking, I have discovered that I have a lot of items that were super appropriate in Chicago… but will not serve me well in Southern California… like snow boots, for example. Right before I moved to Chicago in 2005, I purchased a schmancy pair of North Face snow boots for quite a pretty penny. I bought the boots knowing nothing about Chicago winters and what I would actually need… but bought them on speculation of what I THOUGHT I would need. These boots were more boot than I needed or would need (unless I was traveling to the South Pole). I held on to them while in Chicago just in case the snowpocalypse happened, but now that I am in a completely different climate, I wanted to try and sell them on eBay. I’m trying to simplify my life and pare down inessentials… and a pair of boots that I only wore for a weekend are the height of inessential… especially since I have three other pairs of winter boots LEFT in my closet!
There are some great photographers out there. There are some great BLOG photographers out there. Some people just have the gift of seeing the world through an artistic lens. I want to be a better photographer. I WISH I were better. I don’t know if it is getting a better camera than my iPhone or if I need to take a class, but something I wanted to add to my photography arsenal was a light box. There have been several instances since FTTDWYW’s inception when I wished I had a light box to take a better picture without background interference. This, coupled with my desire to take good eBay pictures led me to start searching the interwebs for a good light box tutorial.
I was looking for something that would be cheap, able to be homemade, and something that I could pack and store when not in use. There are a lot of tutorials out there… and I synthesized the ideas from the ones that fit my criteria into a tutorial for y’all. The materials needed for this project are:
- a cardboard box (which we had plenty of after the move),
- white poster board,
- fabric scissors,
- craft scissors (yes there is a difference),
- two white pillowcases/fabric,
- a cheap bread knife,
- and straight pins.
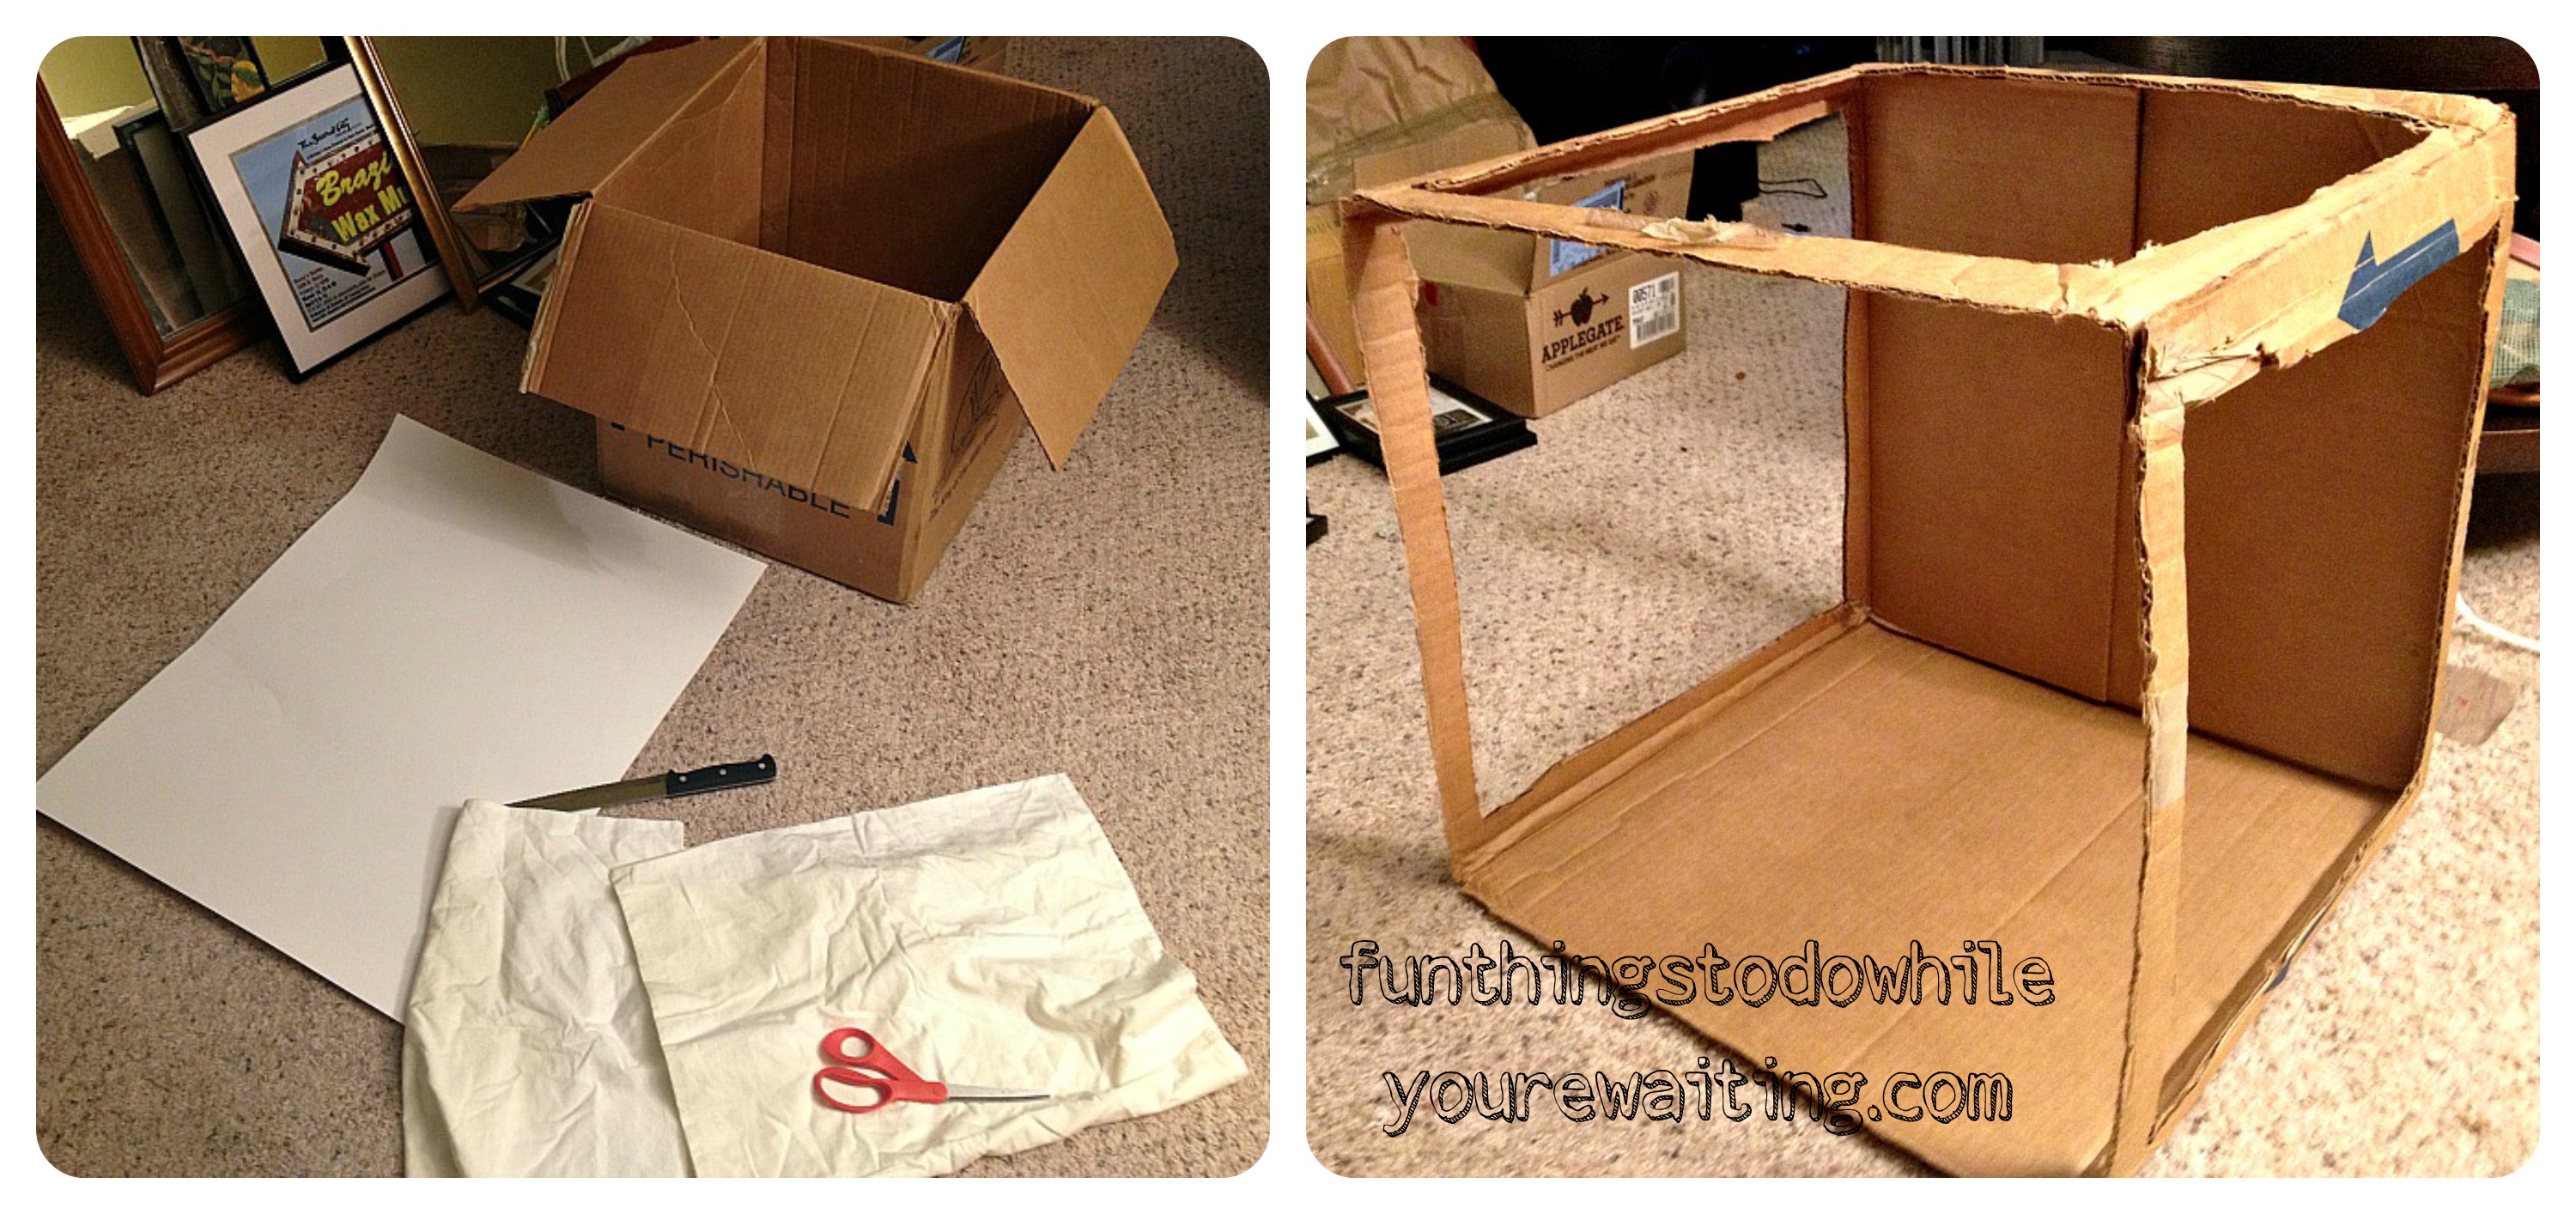
Once you have collected your tools, cut three square sides away from your box (the top and two sides). When cutting cardboard, I like to use a cheap, bread knife instead of an Exacto knife. The bread knife works as a make-shift saw that has the power to cut through the cardboard that the Exacto knife just doesn’t have and the mobility that a pair of craft scissors doesn’t. Once your have your squares cut out, measure your white poster board to fit the width of the box, fold it in the right length and cut with your craft scissors. Here is where I will note that there is a difference between craft scissors and fabric scissors. Once fabric scissors have cut something other than fabric, then they become less effective. I have a dedicated pair of fabric scissors that I never use for other crafting… this may be too one step too crazy for you, but it is worth nothing.
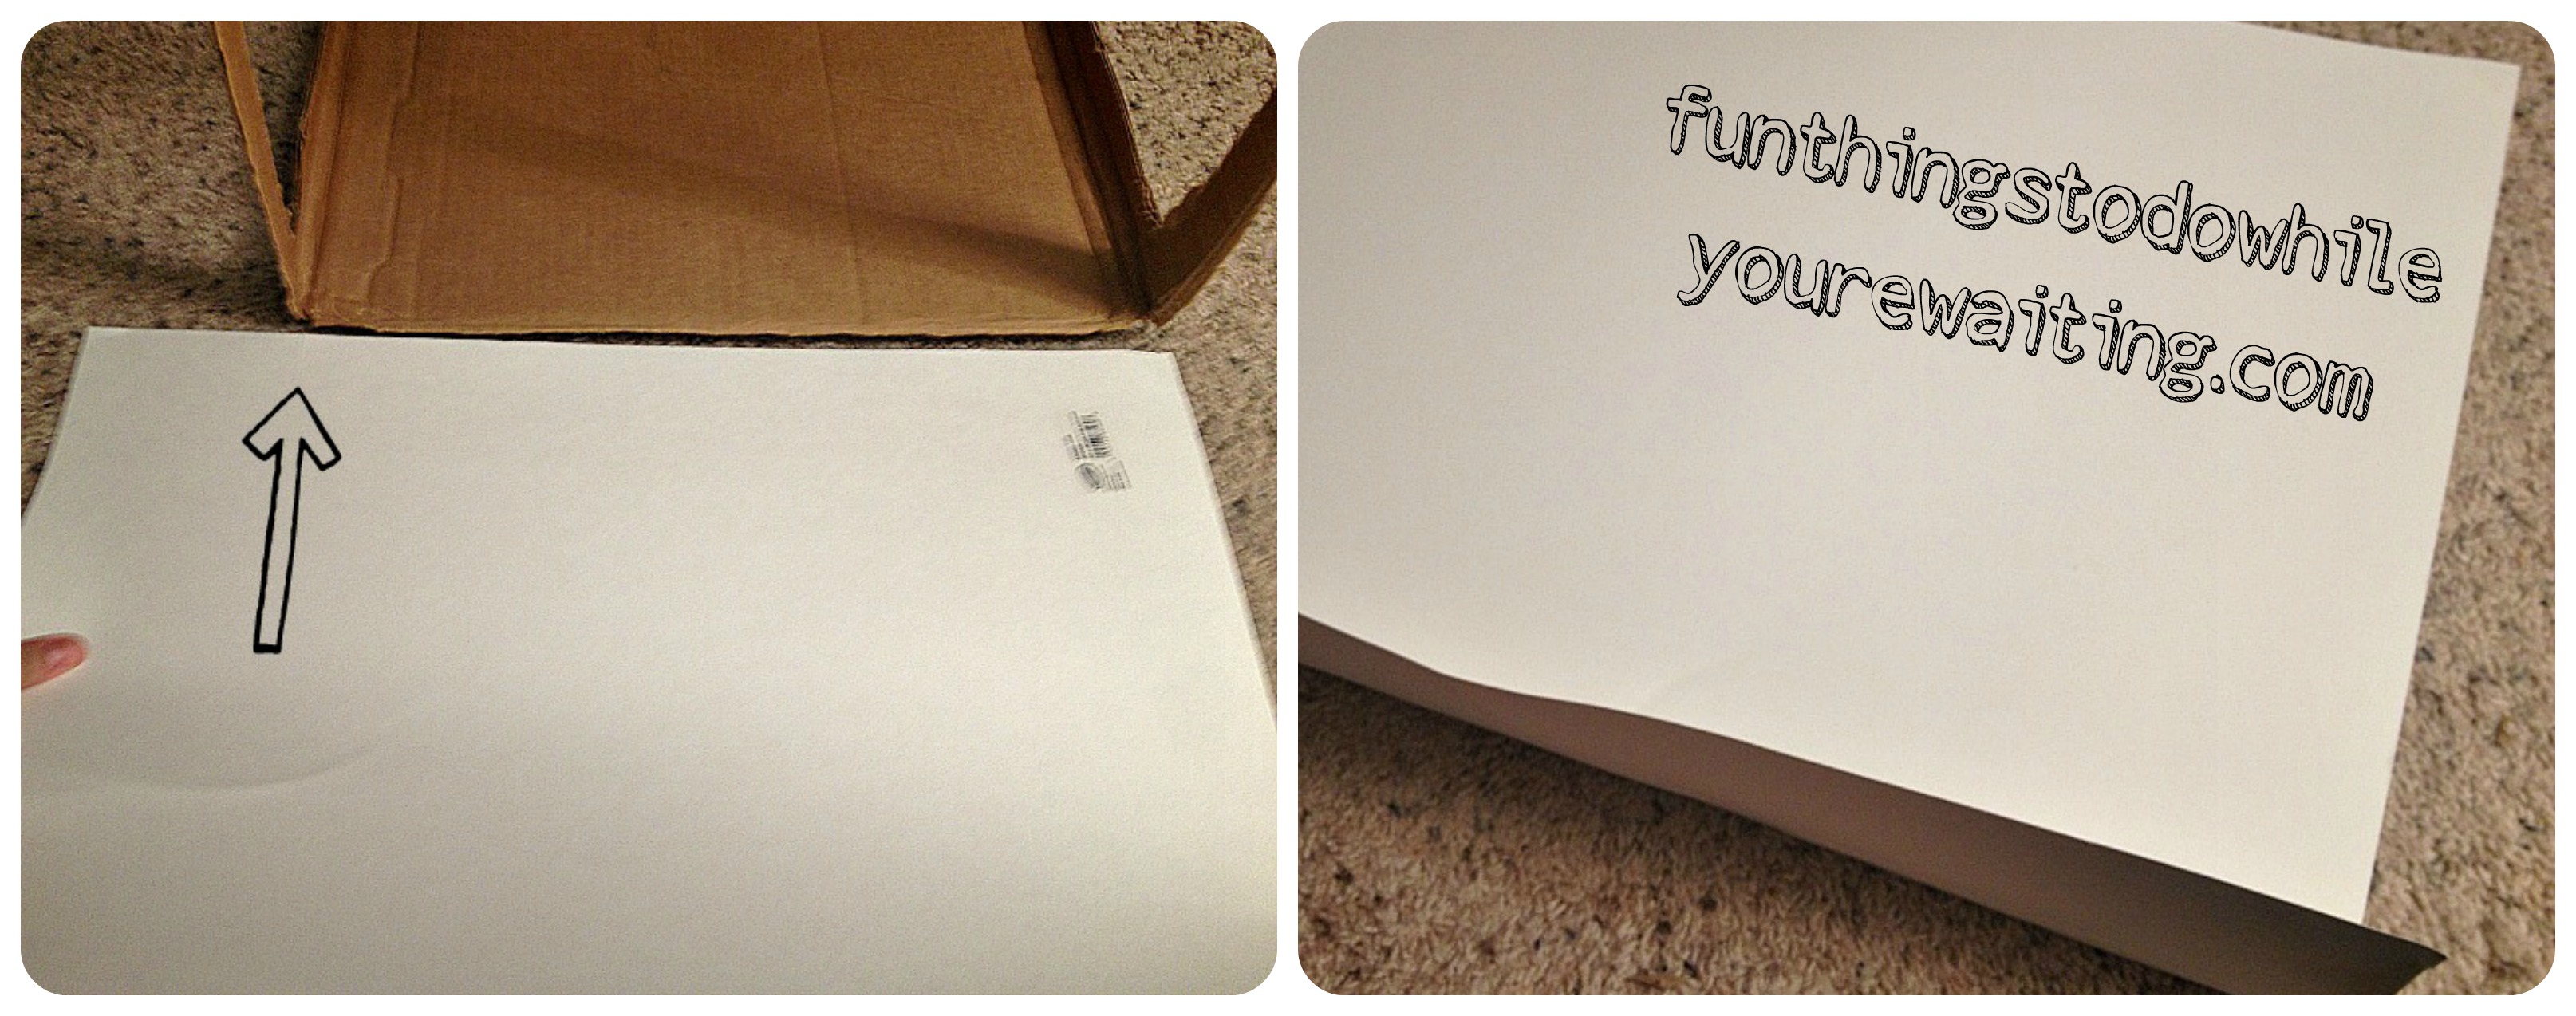
Once your poster board is measured and cut, slide in to fit into the box to make up your backdrop. Whether you want to crease the poster board in the corner or make it a soft curve is up to you. I chose to keep mine soft. Mine fit perfectly– not requiring taping or gluing, but if it doesn’t stay naturally, then tape or glue are options.
Also, a lot of the light box tutorials I read used white tissue paper for the light filters, but since I wanted to store this light box, I knew the tissue paper would rip in storage so I looked for something stronger. As usual, my fabric hoarding came in handy. Although I love crisp, white sheets, white pillowcases turn pretty grungy pretty quick. Which is fine, since I change my pillowcases with great frequency… but both Josh and I are big droolers when we sleep (yeah, I know) and white pillowcases just weren’t working for us. So, I pulled the pillowcases out from my stash and cut them into useable pieces… using my fabric scissors, of course…
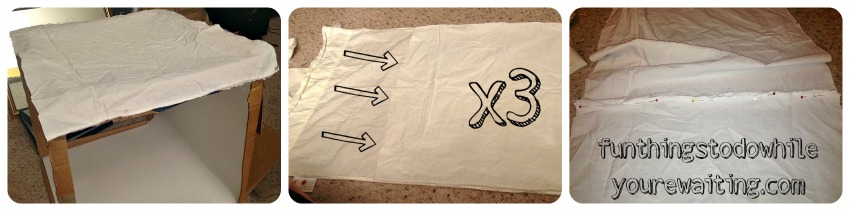
I split the pillowcases and got a general feeling for how big each piece needed (first picture) to be and then cut the rest of them to size (second picture). You will need three, obviously. Next I debated about whether or not to sew two quick seams to create a tent, but after I straight-pinned them together, I realized that the seam was already secure and sewing would just be another step that I wasn’t feeling like doing. That is the third picture, just use the straight pins to hold the sides together that will allow them to drape over the box.
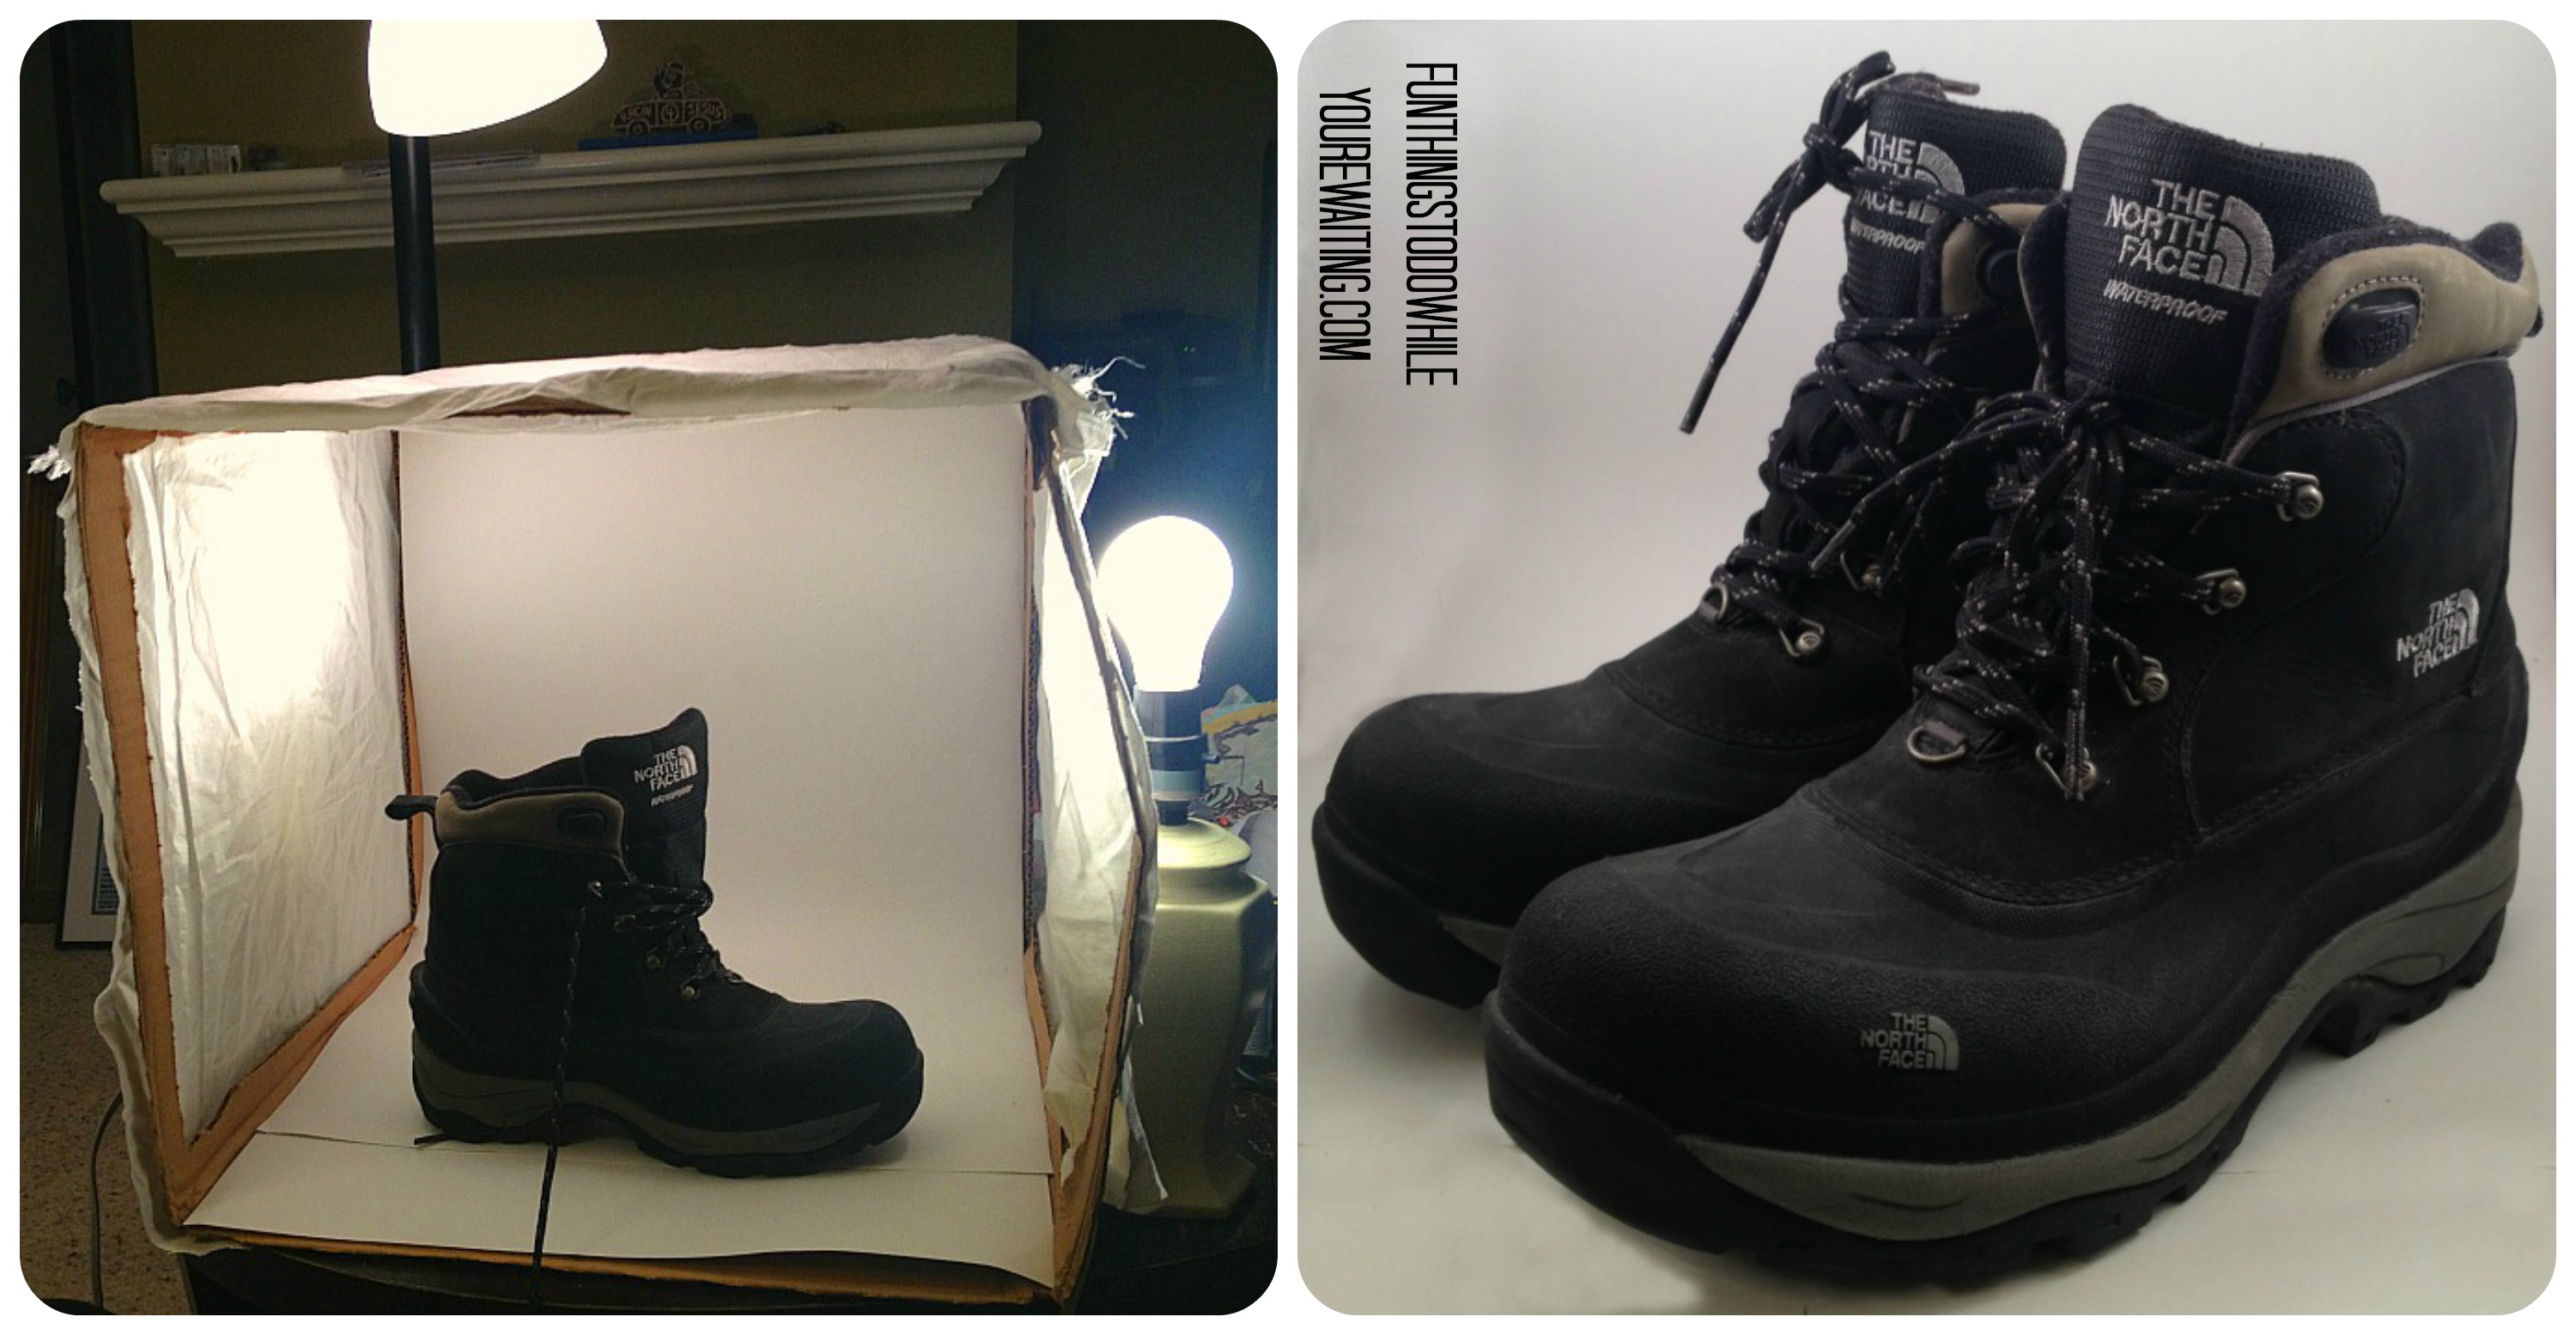
Here is the complete operation. Once the box was draped, I used my task lamp and two, bedroom side-table lamps to provide the light source on all the exposed sides. In retrospect, I wish I had cut the holes a smidge smaller to provide more structural support, but what are you gonna do? On the right is my finished project picture… with which I am pretty pleased.
So, if you have any interest in doing this, it is a super-easy project… especially if you are planning on listing stuff on eBay. And, if you know anybody looking for a really nice pair of waterproof, woman’s size 10 snow boots, let me know!


One Comment