
Baby Crafting: the Final Frontier. This is the tale of the crafter Leigh. Her two-month mission: to explore strange new techniques, to create something for new life in her civilization, to boldly go where some people have already gone before. *Cue Star Trek music of your choice*
No matter your flavor (Original Series, The Next Generation, Deep Space Nine, Voyager, or Enterprise) chances are you either like (or are aware of) Star Trek. My love of Star Trek came later in life thanks to Netflix and Jojo, but my friend Elizabeth has been a hard-core fan since way back. When she announced she was having a baby, I knew I wanted to do something special to celebrate such a joyous occasion. Buying presents is totally acceptable, obviously… but, if I can, I always like to make something homemade. It may not come out perfect, but I think the amount of love you put into something outshines any technical flaws. Plus, your gift will be one of a kind.
Since Elizabeth has a love of most things sci-fi, I knew I wanted to do something to incorporate that fact. And although a Battlestar Gallactica Starbuck tank-top onesie would have been super cool, I thought a Star Trek uniform would take it to the next level. I’m not an idiot. I know baby clothes only fit for like 2.2 seconds before they are outgrown… and every time I sew something for a child, I swear I will never do it again… but I couldn’t resist giving this project a shot.
Some of you who are only aware of the original Star Trek series will equate a red uniform with an early demise of an ensign. On the later incarnations of the show, however, maroon/deep red was a color worn primarily by the commanding officers. After seeing all the generic Star Trek onesies for sale commercially, I scoured the internet for a sewing pattern for a newborn and found a free one at the awesome site: www.startrekbaby.com (which, sadly, has recently been taken down!) It was perfect. It had the right angular lines I was looking for and enough detailed descriptors to make it seem doable- especially for someone who has never sewn baby clothes before.
When I was making the onesie back in March, I was counting on the website being up so I could just point all readers of this blog to the site for construction specifics and detailed instructions. So, sadly, I have very few pictures of the actual construction of the garment. I knew I wanted to use basic jersey cotton (something soft and gentle) and my hoarding tendency of fabric totally came in handy with this project as it was constructed out of two t-shirts that I had gotten for free earlier. Again, I wish I could point you to the original website because it was brilliant. Not only did it have a pattern constructed but it had step-by-step picture tutorials. Something that WAS funny about it was that the original author of the pattern had used a C.A.D. printer to print out the PDF of her pattern. When I printed out her pattern, however, it scaled down to fit MY standard printer. It wasn’t until I was 3/4 of the way done sewing that it became evident that what I was working on was WAY too tiny for anything living. And that is why I have still have a smaller scaled-down, 3/4 finished version of a onesie. It actually wound up being a boon as it gave me a chance to hone some skills that I hadn’t worked on before. The thing about children’s clothes vs. adult sewing is that everything is in miniature. Which seems really obvious except the reality doesn’t hit you until you are knee-deep in bias tape squeezing in every stitch. Here is a picture of the original pattern pieces being placed and cut from a regular XL t-shirt:
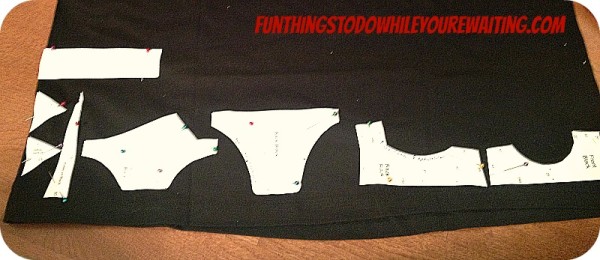
Super tiny, right? Thankfully, when I discovered that my first iteration wasn’t going to work, I had plenty of fabric left to cut a larger version- the ONLY benefit of working in miniature. After a three week hiatus (where I pouted about all the wasted time and work I had put into it) I restarted the project again. I, manually, scaled up all the pattern pieces (as my scanner isn’t sophisticated enough to do it…) and started again; this time wiser and more weary. It all came together and although I had specific notes about working with the pattern (some arm and collar jankiness) it all seems rather moot now that the original site is gone. *sad Riker’s trombone* Blog-friend extraordinaire Sheila used an internet archive and found the original .pdf for the ST:TNG pattern… the website may be gone, but let this be a lesson that if you put something on the internet, it really never goes away. This time, it worked out for the better. But, again, let me tell you, that unless you print out the online version on an industrial, CAD printer, you will be getting a very small onesie.
Below, you’ll find the zip file for the resized pattern pieces, though be forewarned, the pattern size is for the newest of newborns. It is micro. All my friends for whom I’ve made them said they were only worn once for the picture. If I may make a suggestion, I’ve had great success buying two pre-made onesies (one in black for the sleeves and bottom and then whatever color Star Fleet Department you want from there). Use the pattern for the angles, but making a larger one means the lucky tike can use it for longer. You’ve been warned.
Here is the zipped folder of pieces for STONESIE PATTERNS
On to the paraphenalia!
What I will say is that all the versions of the collar pips and the combadge that I’ve seen on similar projects (both handmade or mass produced) have been either ridonkulously expensive to purchase, or super-lame. I was determined to circumvent BOTH of those factors. Online and convention retailers sell premium sets of pips anywhere from $18.00-$50.00. Same goes for the Star Fleet insignia if you are going for maximum authenticity. Although the fabric hadn’t been a budget breaker, the small detail work certainly could have been.
I scoured all the sections and wound up in the button area. I found teeny-tiny, gold, rounded, baby buttons that I thought would be an adequate stand-in for the Star Trek rank insignia pips. After much debate, I went with four pips indicating Captain’s rank in The Next Generation figuring a baby would be at his most Picard-ian right after birth. The combadge, however, took some more debate and research as it, like the uniform, has also gone through many incarnations throughout the run of the show. I went with an earlier TNG style, that I found visually pleasing and I thought I could replicate with the most authenticity.
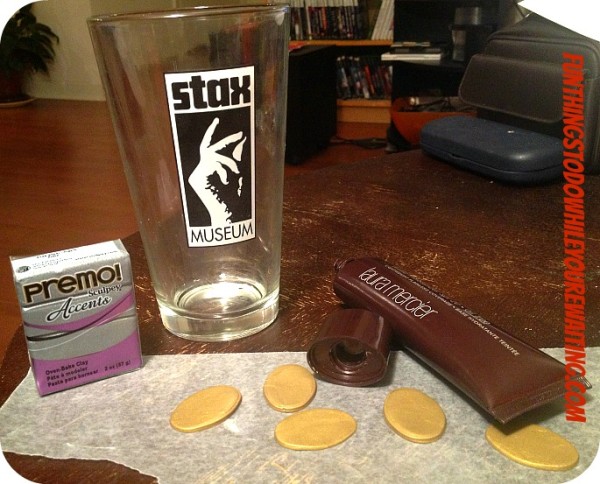
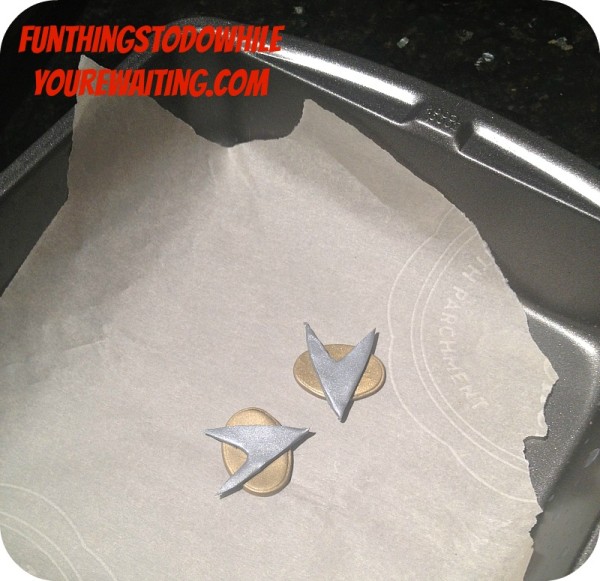
I figured I could use Premo! Sculpey clay (also found at Jo-Ann’s) in metallic gold and silver, sculpt it out and then bake it when I was satisfied with the results. Laying down a layer of wax paper, I rolled out the gold clay into a uniform sheet with a non-stick glass/rolling-pin substitute. Since I don’t do a lot of mold work or have various cutters on deck, necessity was the mother of invention and I used the cap to my Laura Mercier tinted moisturizer as a perfect ovular mold for the gold field. I was quite pleased with the above results and moved onto the silver insignia portion of the combadge. Since it has a distinct shape, and none of my other make-up caps would do, I printed out the version of the combadge that I wanted to replicate, scaled it to the right size and cut it out.

I placed the template onto a sheet of rolled out silver clay and cut it out using a rounded-edge knife that came with my cheap set of kitchen knives. I don’t know what the actual purpose of this knife is, but the rounded edges made edges less jagged; an Exacto Knife would also be sufficient. If you do this project, do a few test runs what the most natural cutting method is for you, but I found that using longer strokes (starting and ending after the pattern) made for cleaner results. I also found that turning it upside down made a difference.

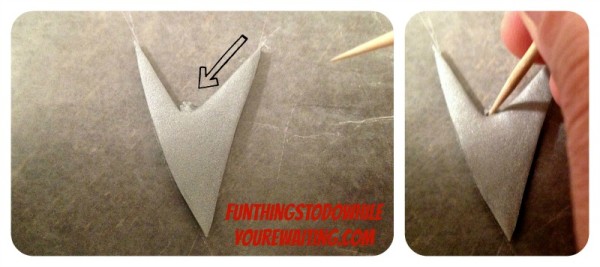
Once you get your insignias cut out, you are left with a nubbin in the center of the “V” that is impossible to prevent without messing up your project, so I used a toothpick to clean up the edges, nudge any detail work, and to fix any other deviations in your insignia.
Once that was completed, I centered the insignia on the gold oval and followed the baking/finishing directions for the Premo Sculpey Clay.
Once finished, I hot-glued two combadges onto bar-pins for Elizabeth and Bryan but hot-glued another one onto one side of a baby snap. I hand-stitched the other side of the snap to the appropriate spot on the uniform so that the insignia could be removed from the uniform when it needed to be washed.
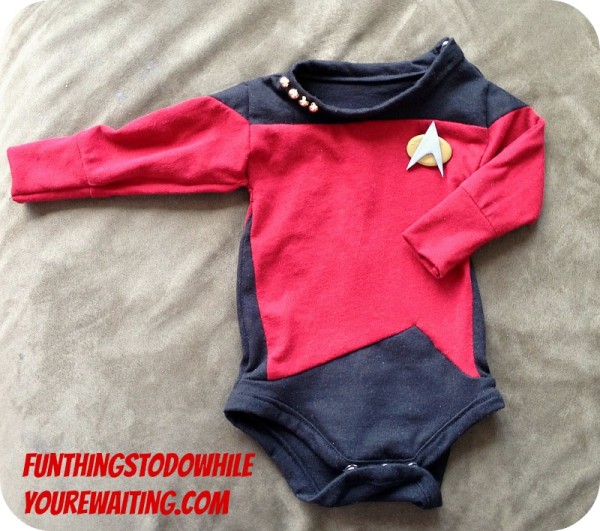
I hand-washed the finished product, wrapped and packed up two extra combadges for mom and dad and mailed off the completed project. Elizabeth was sweet enough to send me the following picture once she received it via the USPS:

I have been looking forward to doing this post for months but was waiting for the final component of the project to share it with you guys… Ladies and Gentlemen, may I present to you the beautiful, perfect Champ Bowden.
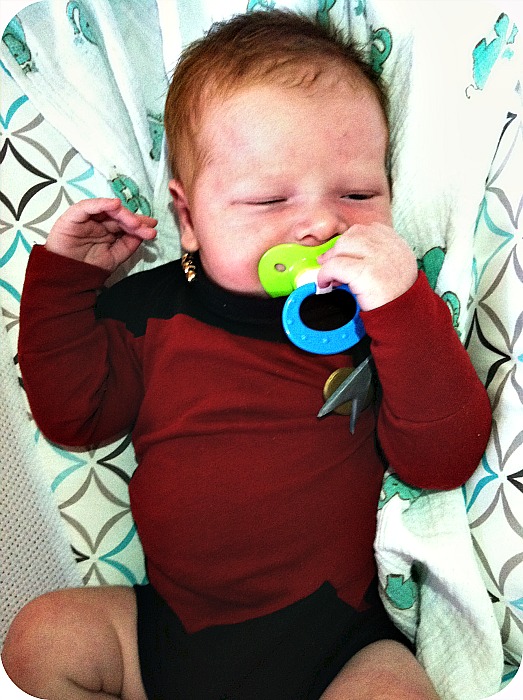
Look at that guy! If he doesn’t make admiralty by three then Q must be to blame. Engage, y’all!
**Hey! This tutorial has been featured! Check it out over at http://geekcrafts.com/14485-live-long-and-prosper-baby/**


Leigh, it turned out great! He looks awesome in it! (Never have I ever watched a single Star Trek, Track or Wars episode… do they even come in all those flavors?)
Fantastic project!! Really turned out super and the klingon sign is a great touch. ¿Is there a link to the research on the combadge that you particularly recommend? Thanks for sharing.
Oh, C.A…. you wouldn’t believe the depths of the Star Trek universe. SOOOO many versions, so much literature, so many games… it is almost as big as the universe itself… but in the end, its all about great story telling.
And Jean Baptiste! How cool that you read this! Here is the link for the particular combadge I used: http://www.popscreen.com/p/MTU1MDMwNTQ4/Star-Trek-TNG-Next-Generation-Communicator-Comm-Badge and also, here is an interesting read on Star Fleet rankings that is more detailed than I ever imagined… http://en.memory-alpha.org/wiki/Starfleet_ranks
Thanks for reading!
Leigh, this is so terrific! Looks great and has an amazing impact as the MOST thoughtful gift! for M & D too! Bestest!
I actually thought you had found two plain onesies of the correct colors and merged them! That might work actually. But wow! the neck and sleeve “cuffs” are major great!
Hi there! I’m the creator of startrekbaby.com. I stumbled onto this blog entry when I googled my old domain name and I loved the read! I didn’t think anyone ever visited the site, that’s why I took it down. I love that you did though! And it looks like Captain Bowden approved of his uniform, great! This almost makes me want to bring the site online again 🙂
I apologize for the printing difficulties 🙁
AHHHH!!! Kristian! I have so been hoping that one day you would find me! Every few months, I would check to see if your site had reappeared! I don’t know if you saw the follow up post to this post, but I posted the pieces of your scaled-up pattern. We would be so honored to host any of your original post that you would want to share. I just wanted to make sure that you get all the credit! And trust me, I would LOVE to have an awesome printer and am super jealous that you do! I’m just an idiot who didn’t measure and cut twice! Please email me @ fttdwyw@gmail.com. Would love to chat further!
Loved this, was wondering if you could share the patterns?