I have been a member of the Pinterest community for several years now. I go in spurts where I just troll it all the time and then I will not even visit it for days and weeks at a time. I am pretty good about going through all the food pins and trying recipes but sometimes it takes me a while to revisit some of the project pins that I have pinned.
One of the very first pins that I pinned having nothing to do with food was this pin from Positively Splendid detailing how to create a tiered terra cotta planter. I just loved it- I thought it was simple and cute. But, I never got around to making one of my own until this week.
Bub found terra cotta pots of all sizes on sale at a local store, so we picked up a few. Terra cotta pots, even when not on sale, are the very durable and relatively inexpensive. Bub and I had already decided to shift our pot buying focus to terra cotta rather than plastic pots that generally dry-rot within a couple summers down here. Sooo, finding them on sale was a big bonus.
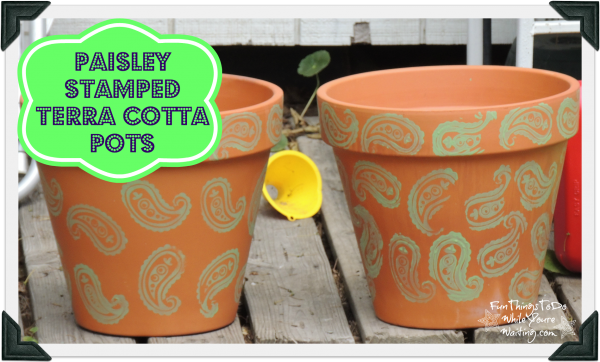
If you remember my last post about terra cotta pots, you will not be surprised that I decided to paint these new pots. And while we are talking about previous posts, you might recognize the paisley stamp I used to paint these new terra cotta pots.
Just like with the shower curtain, I used a sponge brush to paint the paint onto the paisley stamp. The green paint is the sample we got to make sure we liked the color before we painted our former living room/current bedroom (I’ll tell about that at a later date). I was really pleased with how easy it was to do and how well it came out that I did another one to match.
And really, this post could have ended here- but, like I mentioned earlier I wanted to create my own version of the tiered terra cotta pots. So, I saved one of these freshly painted pots and used one to complete my vision.
I painted a second, smaller terra cotta pot with spray paint. I flipped it upside down first and when the paint was dry, flipped it right side up and painted the inside rim so it wouldn’t look funny with terra cotta peaking through.
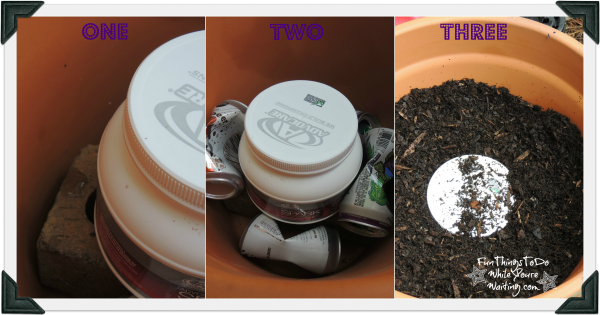
While the purple pot was drying. I got busy filling up the paisley pot. I have seen somewhere on Pinterest, although I could not find where I might have pinned it on my boards, to use stuff to take up space in the bottom of big pots. You do this for a couple reasons. One being to use less soil and another being to help make the pot(s) weigh less.
On the very bottom, I placed a brick… okay, so much for less weight- I was going for height and stability. On top of that I put an empty Spark canister (thinking of burying a canister full of Spark brings a whole new meaning to buried treasure!) and around the canister I placed empty beverage cans and then filled in with dirt.
I placed the purple painted terra cotta pot on top of the dirt and added plants.
It does not matter what you decide to plant in your planter although I would consider where you are going to place your planter in your yard and how much sun it will get before you buy any plants. Although most of my yard is covered in shade, I knew this was going to be in one of the few really sunny spots. I needed plants that love to be in the sun for 6 or more hours a day. If you are going to put yours in the shade, pick shade-loving plants.
Overall, I really love this little project and how this stacked planter turned out. I encourage you to create one of your own!


One Comment