[spotify track=”spotify:track:2F4vE7HMmvGqyY0k07AvHq”]
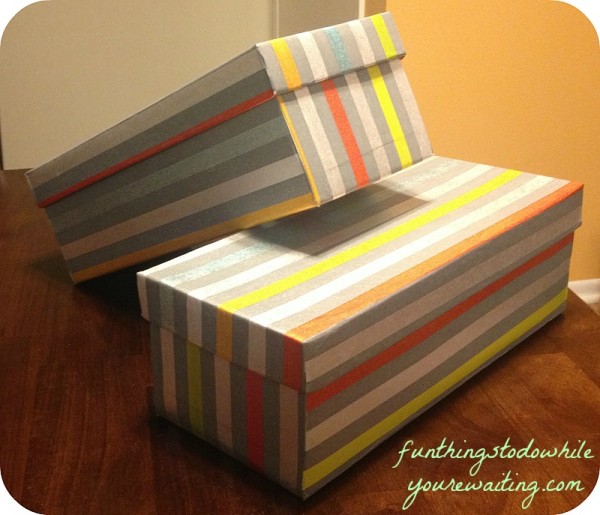
Little boxes, on my table. Little boxes made with wrapping paper.
Little boxes, never ending. Little boxes, ugh! Insane!
If you read this blog with some regularity, by now you know how much I love both crafting and re-using/upcycling things. Although I’ve never mentioned it, I also kind of have a thing for storage containers. There will never come a time where I will tell you that I have enough. I love segregating tiny things into their own individually sized compartment. I carefully pack boxes within boxes– I must have ALL OF THE organization.
I’ve seen several pins on Pinterest touting a cost-saving, and crafty way to create stylish storage containers from boxes you already have by decoupaging them with Mod Podge. For those of you unfamiliar with decoupage, it is the act of adhering paper-cutouts to an object through an adhesive medium. So… using paste to cover something in paper. After our move to California this past summer, boxes are something I have. Also something I already had? Mod Podge. Mod Podge is an all-in-one glue/sealer/finisher that is pretty much synonymous with decoupage. There are people on this earth who can do magical things with Mod Podge. I keep forgetting and have to be reminded every four or five years that I am not one of them. Of all the crafts I CAN do, Mod Podge is the one I enjoying doing the least. I’m not sure why I keep forgetting this and attempting to do projects that involve sticky glue and super-precision.
My office/crafting area has been in chaos since we’ve moved as it has served as a catch-all for everything else. I am finally done organizing (and sometimes RE-organizing) the kitchen, bedroom, bathrooms, and living areas of the apartment, and I am finally ready to tackle and activate my office. So, when I found some wrapping paper at Target that matched the colors of our office, I thought this would be the perfect time/project to take back into the Pintesting Lab. And, like all of my grand, ambitious projects, it sat for several months until recently.
I love the Olympics- summer or winter. They are both so simultaneously amazing and hilarious. The pageantry, the silly names, the commentating… gets me every time. Although I love watching them, I also love having them on in the background while I multi-task. Like all sports, there is a lot of warm-up coverage and filler before and during the event. Some parts of the event will require more of my attention than others, but for the most part, I can just keep my head down and do some work while enjoying the banter of the talking heads and hearing about countries you only remember exist when watching the Olympics. I decided that the opening ceremonies would be the perfect occasion to crank this project out!

Since I had two smaller boxes that were the same size, I decided to cover those first. Tape down any tabs on the interior of the box for regularity (right above pic)… aaaaaaannnnnd… here is where this all starts to go downhill. Like I mentioned above, for whatever reason, I forget how much I don’t really enjoy this craft until I am elbow-deep in a project. To cover the boxes, you need to precisely measure out the paper so that it will fit all the edges. You can measure each plane/side and cut a corresponding piece that will cover it precisely and THEN glue it, or you can cut, glue, and wrap. Who is to say which way is better? I chose the latter because it seemed LESS tedious. Heh. That’s funny because of how tedious this project IS.
To make things as easy as possible, I placed the box on the underside/unprinted side of the paper to measure how much paper I would need to cover it lengthwise. I unrolled the paper long enough to cover the box and the edges (picture one) and cut across removing it from the roll and making it easier with which to work. Since I had two boxes with two lids it made sense to simply fold the just-cut paper in half and cut so that I would have two equal pieces. Once you have two even pieces of paper, divide and conquer. Pour your Mod Podge in a disposable bowl (or not, if you want to wash) and using a sponge or paint brush to apply paste to bottom of the box. Press box bottom firmly onto center of paper. Smooth paper to remove any air bubbles. Since the box bottom was slightly pliant, I had to delicately do this and used a plastic Sephora Beauty Club card to do it. Once the bottom of the box is adhered, use a long ruler to create lines measuring the paper needed to cover the sides and edges (picture 2). Cut and remove unneeded paper (picture 3). 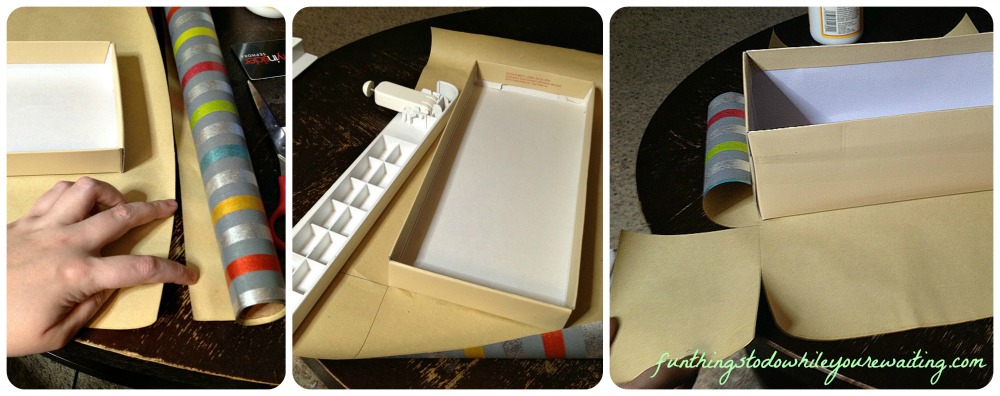
To clarify, I’ve created a cutting diagram:

Cut on the black lines. The boxes with X’s indicate the unneeded paper.
Once you have your paper cut out, start Mod Podging the sides distributing the paste evenly through to the corners.
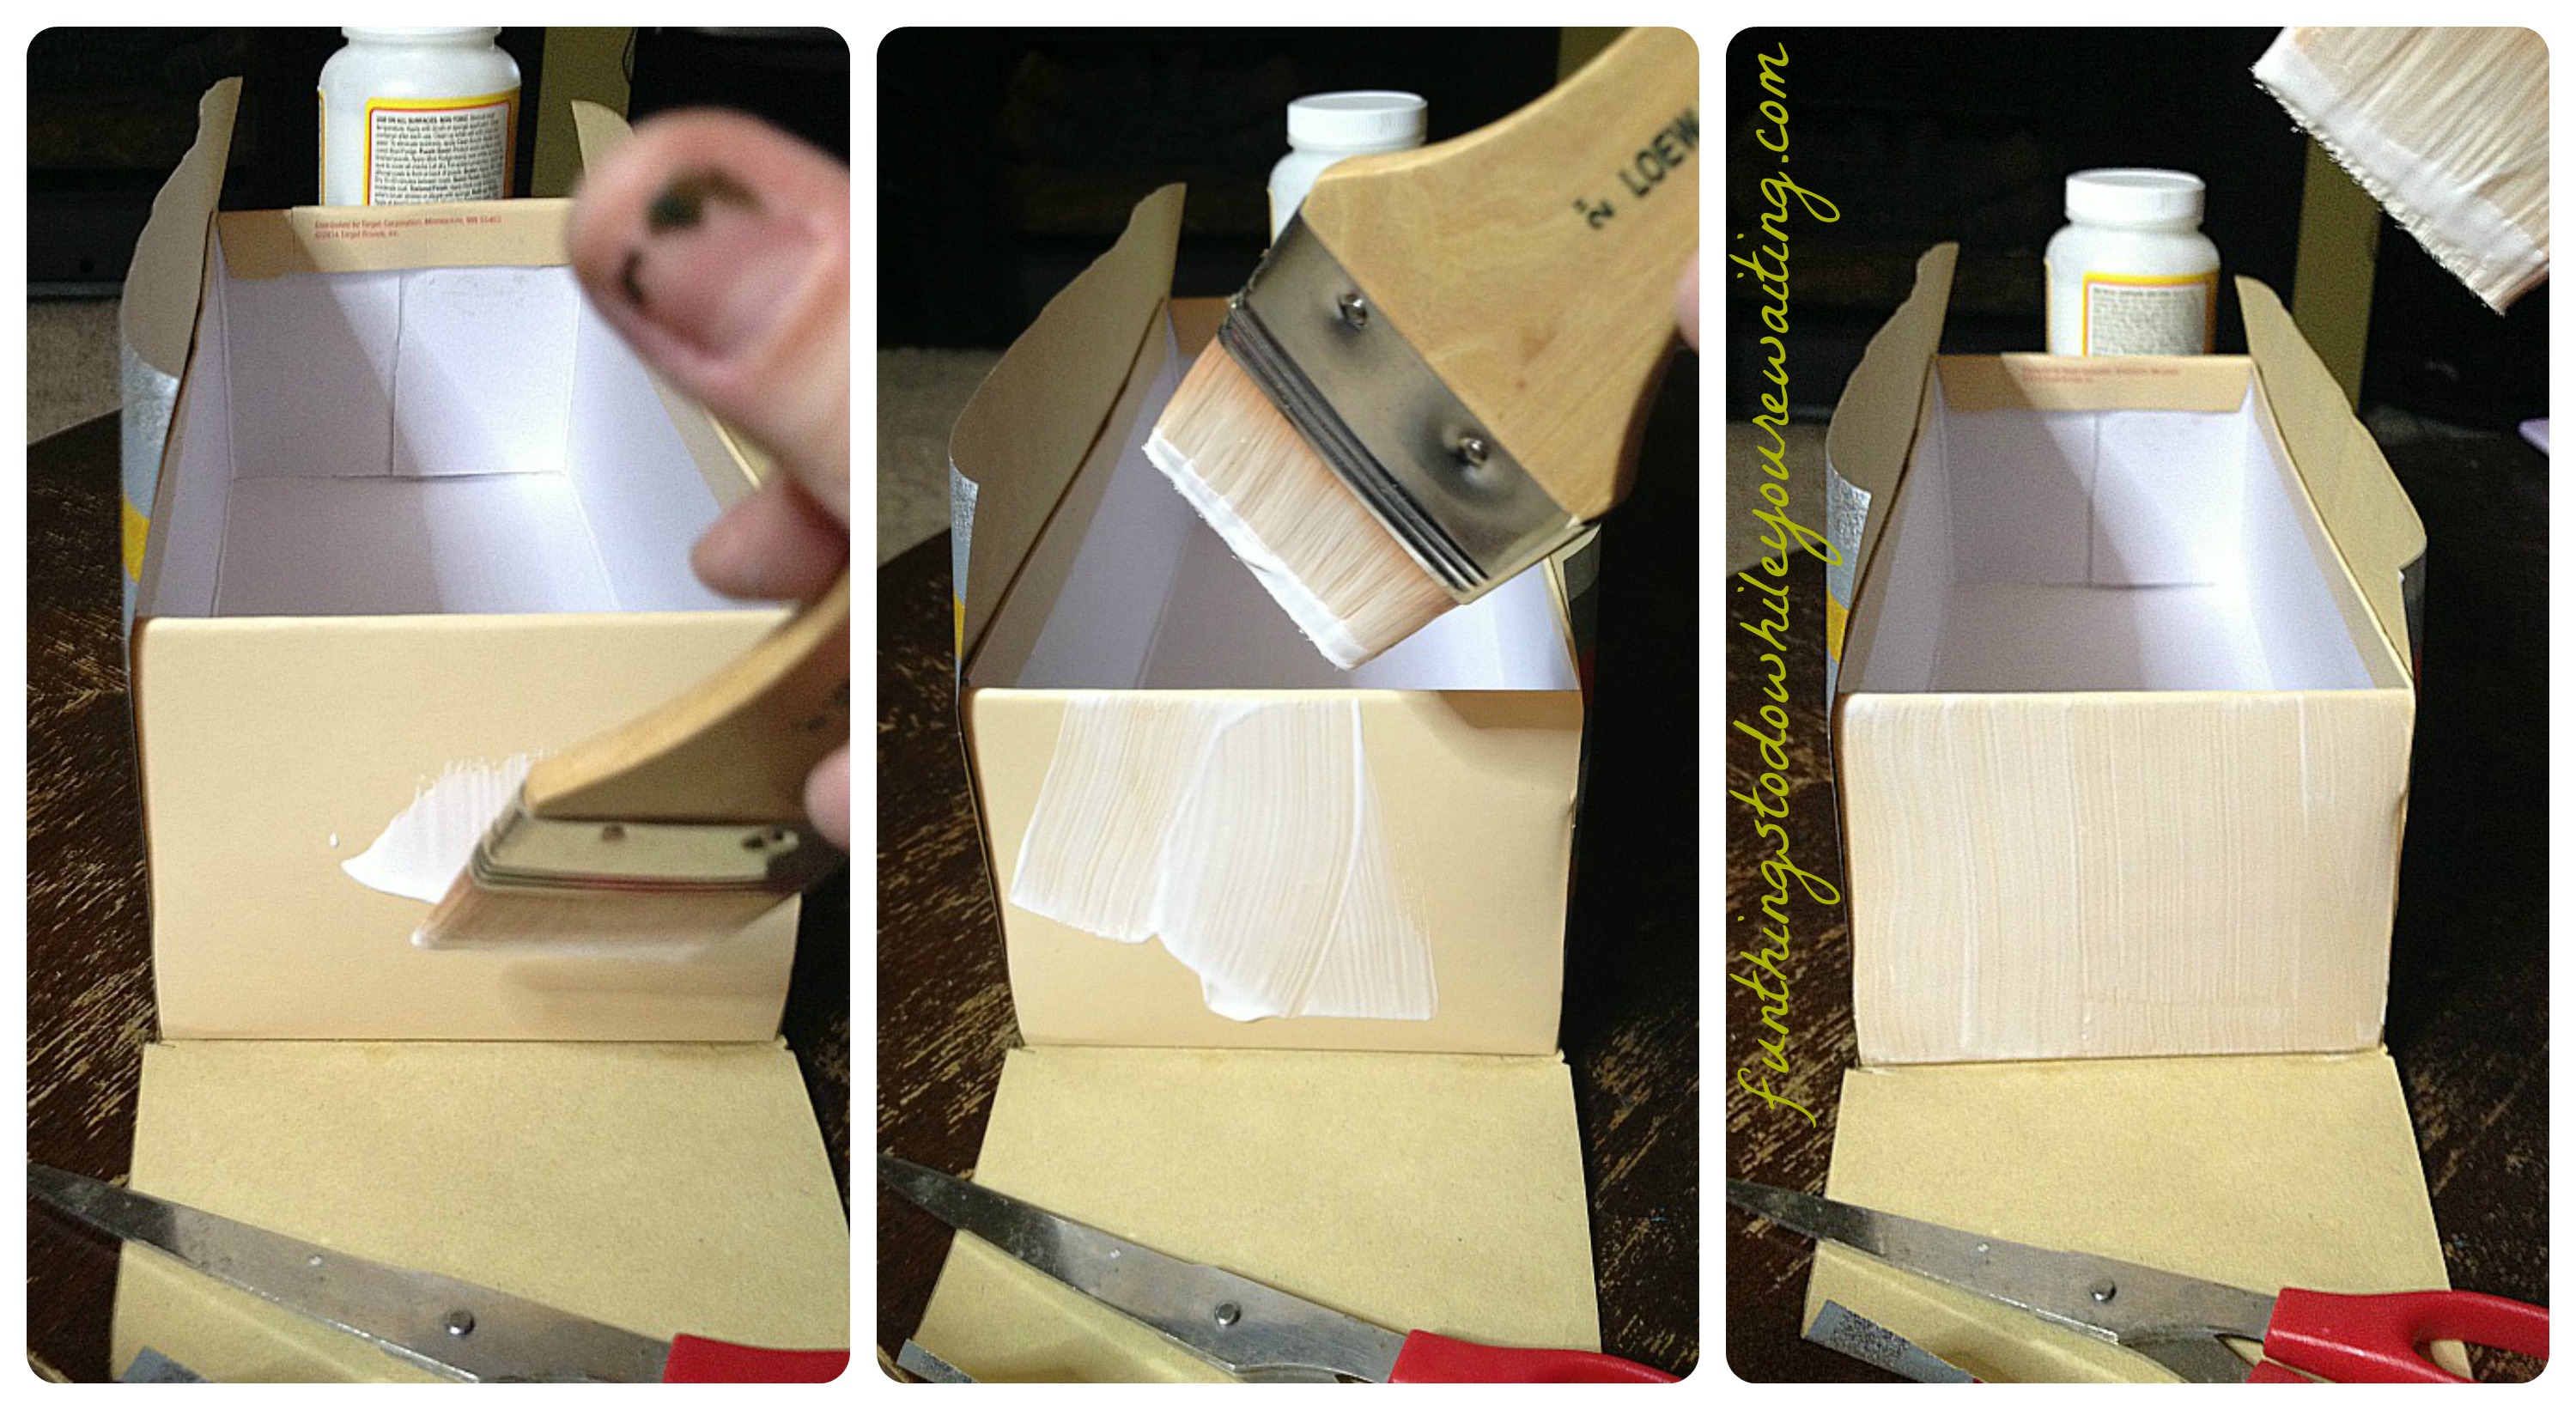
Carefully, lift paper and cover side, smoothing paper from bottom-up. Apply paste to interior edge and wrap the paper around. Depending on how OCD you are, you can measure the paper to completely cover the inside of your box as well, but since these boxes had lids, I really didn’t care. Do this for all four sides.
If there is noticeable overage on the corners, take your scissors and trim it off. See the overage? No bigs, just be careful not to trim TOO far or your corners will be exposed.
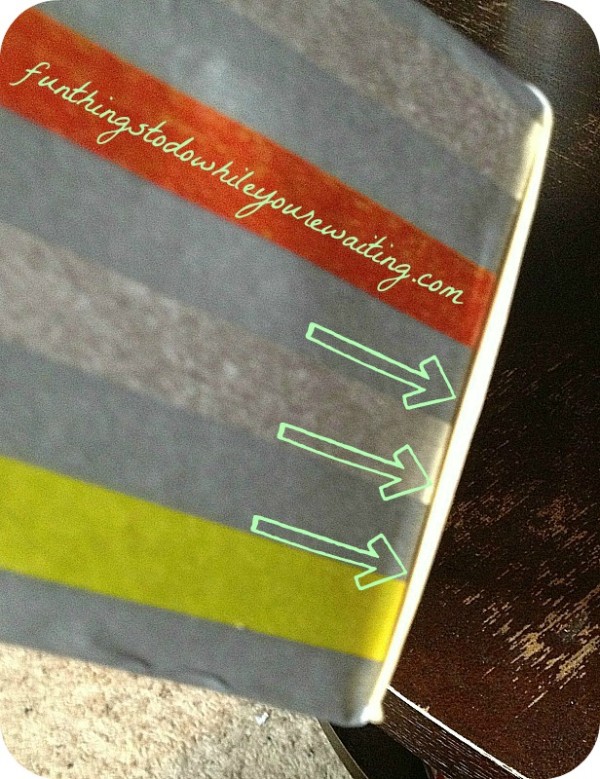
Awesome! You’ve got a covered box! Now do that again for the other box. Yep. All of the measuring. All of the smoothing. All of the sides. Okay, GREAT! Now do that again for both of the lids! By the second side of the second box, I was OVER this project. Not only that, but (because I am so brilliant) I picked out a paper that had stripes that had to line up adding a further level of tedium. It took me the entire opening ceremonies to cover these two smaller shoe boxes. That’s like 3 hours.
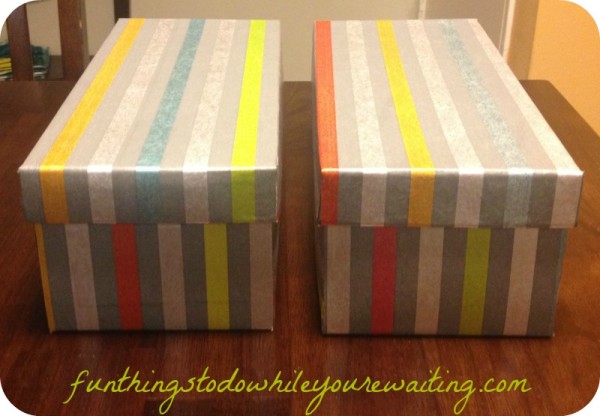
Additionally, I would not recommend this project to anyone with small children, or pets. It requires lots of space, patience, focus, and precision. Matter of fact, I’m not going to recommend this PROJECT to anyone. Because there are glue and corners involved, although the box tops closes easily enough, there is still some slight drag upon removal of the lids. I refused to apply the sealing coats of Mod Podge not wanting to paint each side, wait for it to dry, and then do THAT again several times to build up the appropriate finish. So, do they look good? Yeah. Worth the work? NOPE! Avoid this project. By the time I started my second lid, I had it down… but the problem was, I didn’t want to. Originally, I wanted to cut the flaps off my larger boxes and use this method to store my fabric hoard. But I don’t know. The whole operation was an exercise in frustration… which means I’m sure I’ll do it again soon. Uggh. I’m the worst.
Do you have the patience? Would you rather just BUY pretty boxes? How far would YOU go to save money? As always, let us know!


This made me LMAO! Totally been there and done that. I am OBSESSED With boxes and ALL THE ORGANIZATION too. Amazon has great prices on steralite containers. Now I am trying to find some beautiful way to label all my boxes!
Laura, I wish you hadn’t told me about amazon’s great deal on steralite containers. Seriously. I have a box for storing boxes. 🙂 If you come up with a great/pretty label system, PLEASE let me know! Thanks for reading!!!