I have mentioned several times before that our house is a work in progress. Bub and I have a list perhaps a mile long of stuff that we want to do. And we have a pretty decent sized list of stuff we have already done. As we are inspired to tackle another project and can afford to do so, we mark it off the list. I have to say, that for every project we complete, we add another 3 or 4 to the list.
Some projects require both of our effort and some only require one of us. This project required only minimal effort from Bub. I would looooooooove to replace every chandelier in my house. They are all original and basically, nothing special. I am sure in 1985 when our house was built, brass chandeliers were awesome. Today, I do not think they are awesome. I want new ones. Unfortunately the ones I want cost an arm and a leg, so I had to devise a different plan. May I introduce my friend, spray paint.
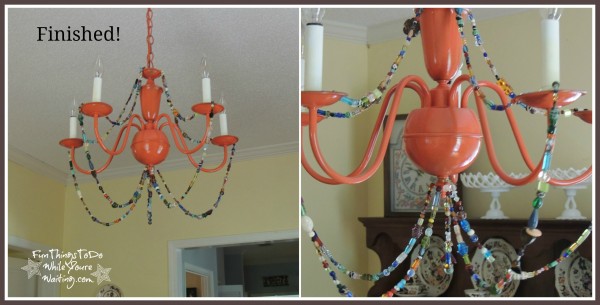
What I really like about spray paint is that you can totally change the look of most anything for fairly little money and if you don’t like the outcome, you can change it relatively painlessly. So, I decided it was time to give my dining room chandelier a make-over. Originally, I was gonna paint it a hammered stainless steel color but then decided that A. that doesn’t really match my dining room and B. that is too safe. So, I stepped on out there (for me anyway) and painted it orange!
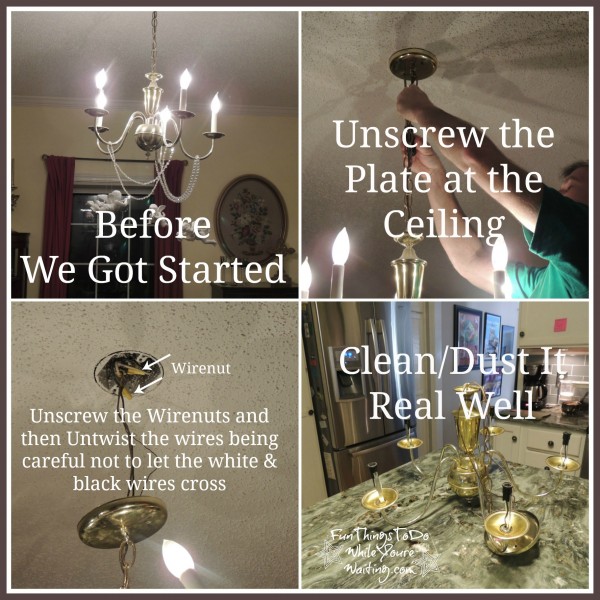
The first step in the process was taking the chandelier down. (This is where Bub comes in.) He assured me that it is pretty easy to take a chandelier of the one we have’s caliber down. Here are the steps:
- Turn off the power to the light source.
- Unscrew the face plate from the ceiling.
- Unscrew the wirenuts. We had two.
- Unwind the wires being VERY careful not to cross them or touch them together as you do this. (White on white or black on black)
These steps in reverse order are the way to re-hang the chandelier.
Once I got the chandelier good and clean, I took it outside and hung it on a low branch of a tree in order to spray paint it. I primed it and painted it with spray paint- the process was painless.
And Bub rehung it going in the reverse order of the steps he took to take it down. And I let it hang there for several months… I liked the color, it matched my dining room but… it needed something. It needed something to take it up a notch. For a while, I thought maybe it needed some clear shiny beads, but then, it struck me that colorful beads would look great too! (Plus, I already had enough to do what I wanted.)
So, I measured the length of what I thought would look good and set about stringing beads. I used fishing line, again, I had it on hand. I am sure other stings would work but the fishing line worked great. I needed 5 shorts and 5 long strings of beads to complete the look I was wanted to achieve.
I have to say, I am really pleased with the outcome of this chandelier. It will certainly get us through until we can afford to drop some cheese on a new one. I also think it kind of has an New Orleans feel to it with also pleases me! I hope this inspires you to work with what you have and yet still achieve a great transformation!


One Comment